mouse sensitivity and wrist pain
Yes — and the fix is usually not “a new mouse.” It’s matching your sensitivity to your movement style.
Mouse sensitivity can trigger wrist pain in two opposite ways: too low makes you drag and overreach (often twisting the wrist),
while too high makes you tense your grip for micro-control (static forearm load).
The best target is the Goldilocks Rule: your cursor should cross most of your screen with a smooth forearm glide,
not repeated wrist flicks and not white-knuckle precision.
- Goal movement: forearm + elbow guide the mouse; wrist stays mostly quiet and neutral.
- Fast target: one comfortable glide should cover roughly 70–90% of your screen width.
- Common sweet spot: 800–1600 DPI for office work, then tune OS sensitivity (not random jumps).
- Non-negotiable: turn off acceleration so your hand learns one stable speed.
If you have night numbness, tingling in the thumb/index finger, dropping objects, or weakness that’s worsening,
treat it as a medical signal (not a settings problem). Pause the setup tweaking and consider professional evaluation.
Last Updated: January 7, 2026 |
Expert Review: WorkNest Ergonomic Lab |
Author: WorkNest Team
- Turn off acceleration (Windows “Enhance pointer precision” OFF / macOS disable acceleration via system tools if available).
- Set mouse DPI to 800–1600 (start at 1000 or 1200 if you’re unsure).
- Adjust OS sensitivity so one relaxed forearm glide covers 70–90% of screen width.
- Do a 60-second test: browse + scroll + select text. If you grip hard or flick your wrist, you’re too fast (or your desk space is too small).
- Lock it for 3 days. Your hand needs consistency more than constant tuning.
Wrist pain from mouse use usually isn’t dramatic. It’s the quiet stuff:
you start “pinching” the mouse, your wrist rotates a little, your forearm starts burning, and you don’t notice until the day is half over.
That’s why sensitivity matters—because it changes how your body solves the same cursor problem.
Table of Contents
- 1) The real mechanism: sensitivity changes your pivot point
- 2) The two traps: too low vs too high (what it feels like)
- 3) The Goldilocks setup: DPI + OS speed + desk space
- 4) Step-by-step calibration (Windows + macOS + trackpads)
- 5) Grip + mouse size checks (why your hand “locks up”)
- 6) Fix the workstation, not just the slider (height, reach, arm support)
- 7) Comparison table: drifting vs stable signals
- FAQ
- Internal Links
- Sources & References
- Professional Disclaimer
1) The real mechanism: sensitivity changes your pivot point
Your “pivot point” is the body part your brain uses as the main driver for cursor movement.
If sensitivity is off, your body quietly switches pivots:
it either overuses the wrist (small joint doing thousands of repetitions) or over-tenses the forearm grip (static holding).
Cursor moves are driven mostly by forearm glide and small elbow movement,
while the wrist stays relatively neutral (not constantly flicking or twisted).
2) The two traps: too low vs too high (what it feels like)
Both extremes can hurt, just in different ways. Use the “feel test” below before you change anything else.
| Setting trap | What you notice | Typical body cost | Fast fix |
|---|---|---|---|
| Too low | You “run out of mousepad,” lift/reposition often | More reach, more repeated motion, wrist twists to compensate | Increase DPI or OS speed slightly; improve mouse space |
| Too high | You overshoot, then “micro-correct” constantly | Grip tension, forearm burn, precision anxiety | Lower DPI/OS speed until hand rests lighter |
3) The Goldilocks setup: DPI + OS speed + desk space
Here’s the part most guides skip: DPI alone doesn’t solve it. Your “right” speed depends on your screen size,
desk space, and whether your work is precision-heavy (design, editing) or navigation-heavy (docs, email).
If you have a tiny mouse area, you may need a slightly higher speed — but the moment you grip harder or start flicking your wrist, you’ve gone too far.

4) Step-by-step calibration (Windows + macOS + trackpads)
- Pick one baseline DPI (start 1000 or 1200). Don’t jump around yet.
- Disable acceleration so your hand gets consistent feedback.
- Windows: Mouse settings → Additional mouse options → Pointer Options → Enhance pointer precision OFF.
- macOS: System Settings → Mouse/Trackpad tracking speed (macOS has acceleration; aim for consistency and avoid extremes).
- Set OS speed with the 70–90% glide test: one relaxed glide should cover most of the display.
- Do the “selection test”: highlight a paragraph of text and click small UI elements for 60 seconds.
If you overshoot and tense up, lower speed a step. - Lock it for 72 hours. If you change daily, your muscles never settle.
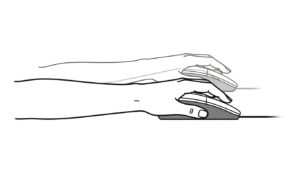
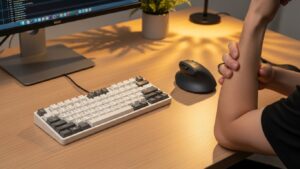
5) Grip + mouse size checks (why your hand “locks up”)
Sensitivity problems often show up as grip problems. If you’re holding the mouse like it might escape, your settings are probably too fast
or the mouse is too small for your hand.
- If your fingertips feel “hooked” and tense, try lowering speed one step.
- If your palm never feels supported, a larger mouse shape can reduce constant finger clenching.
- If you see your knuckles turning pale, you’re gripping too hard — fix speed + posture before you blame your wrist.
6) Fix the workstation, not just the slider (height, reach, arm support)
Even perfect sensitivity won’t help if your mouse is too far away or too high. Your arm should feel “parked,” not hovering.
If you’re reaching outward, your shoulder elevates and your wrist compensates.
- Mouse reach: keep it close enough that your elbow stays near your side.
- Same plane: mouse and keyboard should sit on the same height plane when possible.
- Arm support: light forearm support (desk edge or armrest alignment) can reduce wrist loading.
- Break pattern: short micro-pauses matter more than “one big stretch” at night.
7) Comparison table: drifting vs stable signals
| Signal | Setup is drifting | Setup is stable |
|---|---|---|
| Hand feel | tight grip, micro-corrections, fingertip tension | light contact, smooth moves, less “precision panic” |
| Wrist | frequent flicking, twisting, pressure on palm heel | mostly neutral, forearm guides movement |
| Forearm | burning or fatigue early in the day | steady, less “static holding” sensation |
| Work flow | constant tweaking, never feels “done” | you forget the settings and just work |
FAQ
Q1) Is 800–1200 DPI always best?
A) It’s a strong starting range for many office setups, but the real target is movement quality: smooth forearm glide, neutral wrist, light grip.
If your desk space is tiny, you may need higher speed — just avoid the grip-tension trap.
Q2) Should I use mouse acceleration?
A) For most people with pain, turning it off improves consistency and reduces “over-correcting.” Consistency is calming for the hand.
Q3) Why does my wrist hurt more when sensitivity is low?
A) Low speed can force more dragging, repositioning, and wrist twisting—especially if your mouse space is limited or your mouse is far from your body.
Q4) Why does high sensitivity make my forearm burn?
A) Many people tense their grip to stabilize micro-movements, which creates static load. Lower the speed slightly and check mouse size/shape.
Q5) Does a vertical mouse automatically fix this?
A) Not automatically. Shape can help some people, but speed + reach + arm support still matter. Start with the Goldilocks calibration first.
Q6) When should I stop tweaking settings and seek help?
A) If numbness/tingling persists, weakness appears, pain worsens, or symptoms spread, consider professional evaluation rather than endless optimization.
Internal Links
Keyboard and Mouse Positioning: Wrist Pain Prevention Guide for Long Workdays
Mouse Grip Styles Explained: Reduce Wrist and Finger Fatigue (2025)
Desk Height by Body Height: Complete Guide to Correct Ergonomic Setup for Long-Hour Work
Sources & References
- OSHA — Computer Workstations eTool: Mouse/Pointer Devices
- CDC NIOSH — Ergonomics and Musculoskeletal Disorders
- HSE — Working safely with display screen equipment (DSE)
Professional Disclaimer
This article is for informational purposes only and does not replace professional ergonomic or medical advice.
If you have persistent pain, numbness, tingling, weakness, or worsening symptoms, consult a qualified clinician or ergonomics professional.
Update Log: Jan 7, 2026 — Rebuilt the calibration protocol around the Goldilocks Rule (70–90% glide), added grip audit + workstation reach checks, and included stable-vs-drifting signals table.

I’m not a medical professional, ergonomist, or workplace specialist.WorkNest exists to help everyday people build more comfortable, practical home office environments through clear explanations, visual guides, and common-sense adjustments.
Articles on this site are written from a non-expert perspective, focusing on real-world use, everyday discomforts, and widely accepted setup principles rather than clinical or professional advice.