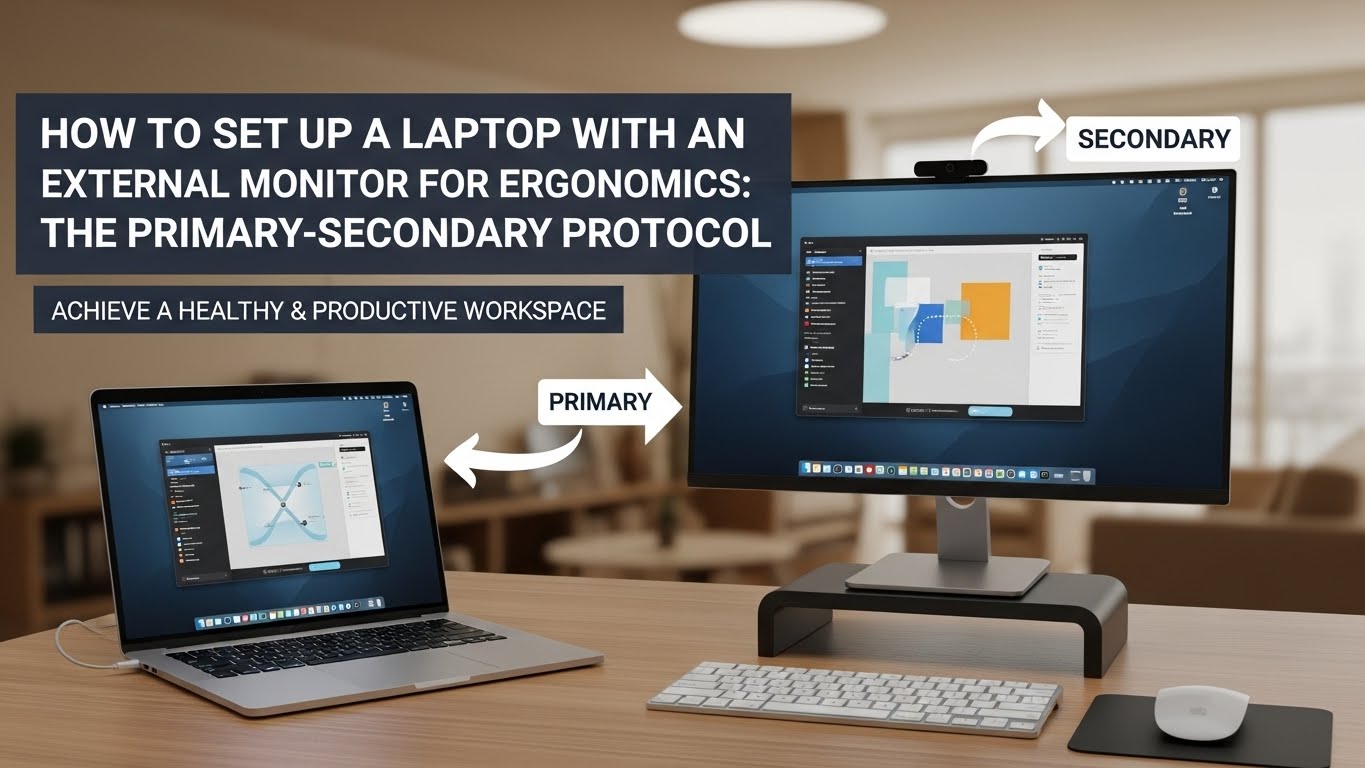
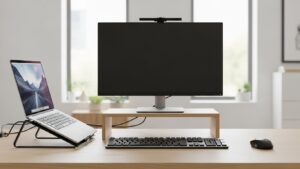
How to Set Up a Laptop With an External Monitor for Ergonomics: The Primary-Secondary Protocol
How do you set up a laptop with an external monitor without neck strain?
The most reliable ergonomic setup is the Primary-Secondary Protocol:
choose the screen you use most of the day, align that screen to your centerline (sagittal plane),
then place the laptop as a true secondary screen so you don’t bounce between heights and angles.
This prevents the two quiet problems that ruin hybrid setups: chin-drop (cervical flexion) and neck rotation.
- Main screen first: the screen you stare at most gets the best height + distance
- Centerline rule: keyboard/mouse must line up with the primary screen to prevent axial neck rotation
- Laptop role: use it for glance tasks unless you can lift it to a similar sightline
- 3-lane cables: route Power / Data / Visibility separately so clutter doesn’t pull your setup out of position
Below: the 80/20 alignment rule, the “level-head” test, and cable engineering that actually stays clean.
- Chin drops when you switch to the laptop (then your shoulders round)
- You “live” on the side screen and your neck stays turned longer than you think
- One shoulder creeps up (keyboard/mouse off-center or laptop keyboard used too often)
- Your eyes feel dry/tired by mid-afternoon (distance + glare mismatch)
- You keep re-routing cables because the desk never feels stable or finished
Last Updated: January 5, 2026 |
Technical Review: WorkNest Ergonomic Lab (DSE + biomechanics checked) |
Author: WorkNest Team
Professional Disclaimer: This guide focuses on neutral body positioning, workstation geometry, and desk organization.
It is not medical advice. If you have persistent numbness, radiating pain, worsening weakness, or symptoms that don’t improve,
consult a qualified clinician or ergonomics professional.
- Pick your primary screen (the one you use for reading/typing most).
- Set that screen so your head stays level while reading the center.
- Center keyboard + mouse to the primary screen (avoid torso rotation).
- Lift the laptop on a stand so switching screens doesn’t force chin-drop.
- Route cables in 3 lanes: Power / Data / Visibility.
“Laptop external monitor setup” sounds easy until you work a full day. The first hour feels productive, then the pattern shows up:
chin drops to the laptop, neck rotates toward the side screen, and cable clutter makes you stop adjusting things—so you keep working in a slightly wrong position.
The annoying part is it feels almost right. So people keep tweaking the desk instead of fixing the geometry.
This guide is built around the boring truth that wins long-term: pick a primary display, lock its height/distance/centering,
assign the laptop a clear role, then make cables behave so the setup stays stable all week.
Table of Contents
- 1) The Primary-Secondary Protocol (80/20 rule)
- 2) Main screen centering: stop axial neck rotation
- 3) Height + the level-head test (chin-drop prevention)
- 4) Distance rules: stop forward-leaning before settings
- 5) Laptop placement by role (glance vs true dual-screen)
- 6) 3-lane cable engineering (Power / Data / Visibility)
- 7) Calls + camera: avoid the side-screen eye contact trap
- 8) Comparison table: drifting setup vs stable setup
- FAQ
- Internal Links
- Sources & References
- Professional Disclaimer
1) The Primary-Secondary Protocol (80/20 rule)
Dual-screen setups fail when both screens act like a “main” screen. Your neck can’t comfortably support two primary displays at different heights and angles.
The fix is the 80/20 alignment rule:
the display you use for ~80% of reading and typing dictates your body’s centerline, height, and distance.
- Most people: external monitor = primary, laptop = secondary (chat/notes/music).
- If laptop must be primary: lift it (stand) + use external keyboard/mouse. Leaving it low is a chin-drop trap.
- If both truly equal: bring screens closer together and match their effective viewing height as much as possible.
Your body will follow attention. If a “secondary” laptop becomes the place you read long paragraphs,
your posture will drift toward it—so either lift it properly or change its job back to quick glances.
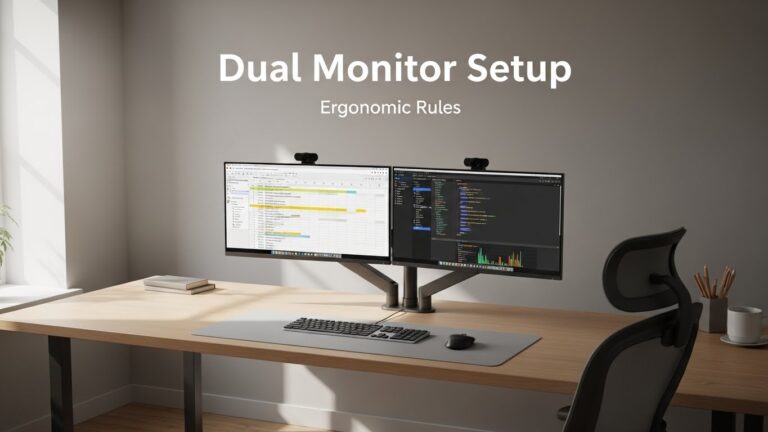
2) Main screen centering: stop axial neck rotation
The most underrated error is not height—it’s off-center placement.
If your main display isn’t aligned to your sagittal plane (your centerline), you spend hours slightly rotated.
That’s how you get asymmetric fatigue: one side of the neck/upper traps working harder all day.
If the primary monitor is off-center, your neck stays rotated.
Over time that can trigger asymmetric scapular loading—one shoulder blade doing extra stabilizing work,
often felt as trap tightness and “one-sided” headaches.

3) Height + the level-head test (chin-drop prevention)
Hybrid setups tend to create chin-drop when you switch to the laptop (cervical flexion),
or shoulder shrugging when you reach for the laptop keyboard/trackpad.
Your goal is not a ruler-perfect number—it’s a posture that stays stable during real work.
Read the center of your primary screen for 30 seconds.
- If your chin drops when you glance to the laptop → laptop is too low or used too often.
- If your chin lifts to read the monitor → monitor is too high.
- If one shoulder creeps up → keyboard/mouse placement or laptop keyboard use is the culprit.
A practical alignment that works for many desks: keep the laptop on a stand so the top edge of the laptop screen sits around the
lower third of the main monitor’s height. That reduces “head bobbing” during switching without pretending both screens are equal.
4) Distance rules: stop forward-leaning before settings
Distance issues create forward head posture even with “good” monitor height.
If you lean in for clarity, your body repeats that pattern automatically.
Fix distance first, then use scaling/zoom so your posture doesn’t pay the clarity bill.
- Start neutral: sit back, shoulders relaxed, elbows close to your sides.
- Bring the primary screen closer: adjust until you stop drifting forward while reading.
- Then increase scaling/zoom: use OS scaling or browser zoom instead of leaning.
- Confirm with real tasks: read + type + scroll for 5 minutes. If you drift, distance still needs tuning.
5) Laptop placement by role (glance vs true dual-screen)
This is where comfort improves fast: define what the laptop is for.
If you treat it like a second primary screen, your neck becomes the “switching mechanism.”
- Best default (most people): external monitor = primary, laptop = glance tasks (notes/chat/music).
- Meetings-heavy: put the meeting window on the screen with your camera; keep notes on the laptop slightly off-center.
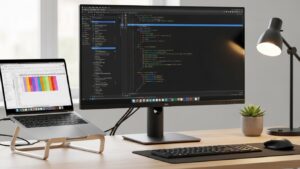
- Deep work (coding/design): if you truly scan both screens equally, keep them close together and reduce height mismatch.
- Non-negotiable when laptop is raised: use an external keyboard + mouse so you’re not reaching upward.
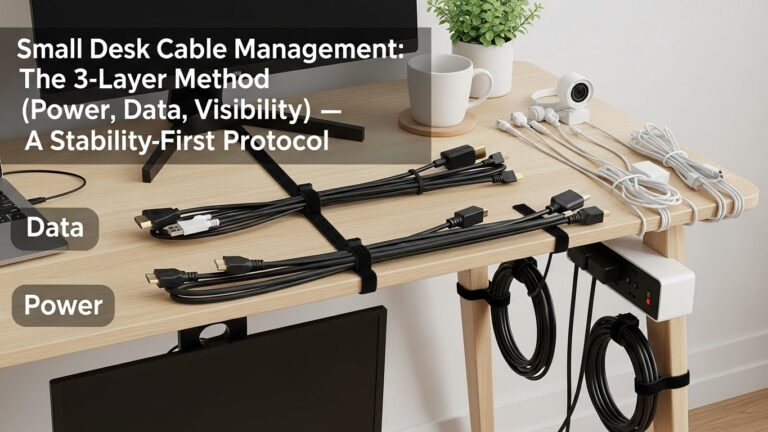
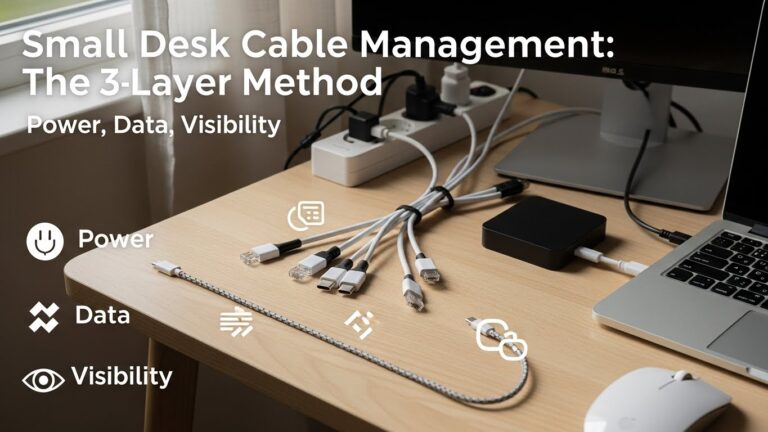
6) 3-lane cable engineering (Power / Data / Visibility)
Cable management isn’t just aesthetics. When cables snag or cross the workspace, people stop moving equipment into the correct position.
Then posture drifts because your desk is “locked” by friction points.
| Lane | Routing standard | Why it matters |
|---|---|---|
| Lane 1: Power | Fixed path, anchored; avoid desk-surface crossings | Stops accidental disconnects and “hot cable pile” zones |
| Lane 2: Data | Gentle slack for docking/undocking, then clipped to one edge route | Reduces port stress and prevents cable tug during micro-adjustments |
| Lane 3: Visibility | Hide from seated view (behind monitor arm / underside trays) | Reduces visual noise so the desk “feels finished” and stays stable |
7) Calls + camera: avoid the side-screen eye contact trap
If your meeting window sits on the side screen while the camera is elsewhere, you’ll spend calls turned away.
That’s a sneaky neck strain pattern—especially on heavy meeting weeks.
- Camera screen = primary during calls: put the meeting window on the screen where the camera is.
- Notes = secondary: keep notes on the laptop slightly lower and closer to centerline.
- Audio gear cables: keep them in the data lane so you’re not constantly re-routing everything.
8) Comparison table: drifting setup vs stable setup
| Signal | Setup is drifting | Setup is stable |
|---|---|---|
| Neck posture | chin-drop to laptop, frequent head turning | level head, small eye movements |
| Shoulders | one shoulder higher, shrugging while typing | shoulders relaxed, keyboard centered |
| Focus | constant micro-adjustments and cable fiddling | you forget the setup and just work |
| Desk feel | visual clutter from cable crossings | clean front edge, cables routed by lanes |
FAQ: Troubleshooting laptop + monitor ergonomics
Q1) Should my laptop be centered or should the external monitor be centered?
A) Center the screen you use most (your primary screen). Centering prevents torso rotation and one-shoulder dominance.
Q2) Is it okay to keep the laptop screen low if I have an external monitor?
A) Yes—if it’s truly a glance screen. If you read it often, lift it or you’ll keep chin-dropping.
Q3) Why do I get neck strain even though my monitor height “seems right”?
A) Usually because the laptop pulls your gaze down, or the primary screen is off-center so your neck stays rotated longer than you realize.
Q4) Should I match the top edges of both screens?
A) Only if you truly use both screens equally. Most people do better with one primary screen and one slightly lower secondary screen.
Q5) How do I stop cable clutter from coming back?
A) Use lanes: power stays fixed, data stays flexible, and visible cables get hidden from your seated view.
Q6) Do I need a docking station?
A) Not mandatory, but it reduces plug chaos and keeps the data lane cleaner if you dock/undock often.
Internal Ergonomic Protocols
- Laptop Stand Height Guide: Optimal Angle for Comfortable Work
- Monitor Distance & Eye-Level: Complete Guide Backed by OSHA Standards
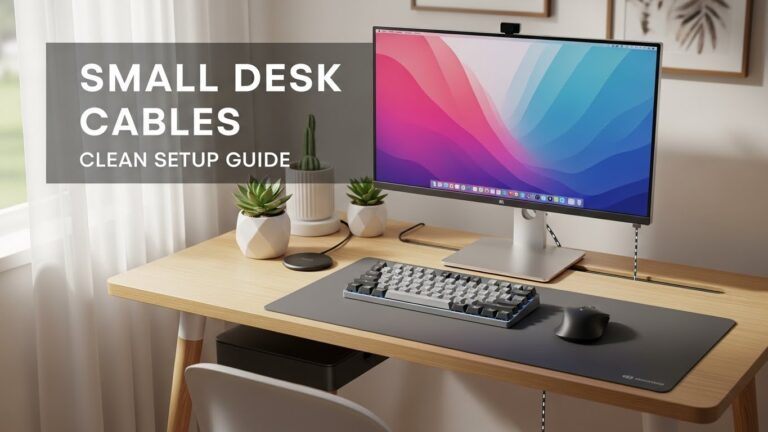
- Cable Management for Small Desks: Clean Home Office Blueprints
Sources & References
- OSHA: Computer Workstations — Neutral Posture Principles
- NIOSH: Computer Workstation Evaluation Checklist (PDF)
- HSE: Working safely with display screen equipment (DSE)
Professional Disclaimer
This content is informational and does not replace professional ergonomic or medical advice.
If you have persistent pain, numbness/tingling, weakness, or worsening symptoms, seek qualified evaluation.
Update Log:
– 2026-01-03: Published main-screen-first framework, added 3-lane cable method, call/camera assignment rules, and stability comparison table.
– 2026-01-05: Integrated Primary-Secondary Protocol, refined centerline/axial rotation guidance, and improved role-based laptop placement rules.
I’m not a medical professional, ergonomist, or workplace specialist.WorkNest exists to help everyday people build more comfortable, practical home office environments through clear explanations, visual guides, and common-sense adjustments.
Articles on this site are written from a non-expert perspective, focusing on real-world use, everyday discomforts, and widely accepted setup principles rather than clinical or professional advice.