Best Webcams for Video Meetings: Lighting, Angle, and Real-World Setup (2025)
Beyond resolution, professional video quality depends on alignment and illumination. Follow these 5 standards:
- Eye-Level Height: Place the lens at your natural eye line to improve perceived “eye contact.”
- Soft Front Lighting: Use a diffused light source in front of you to reduce harsh shadows (“raccoon eyes”).
- 1080p Resolution: 4K is usually overkill; 1080p balances clarity and bandwidth stability.
- Background Depth: Keep 3–5 feet (about 1–1.5 m) behind you to avoid a flat, cramped look.
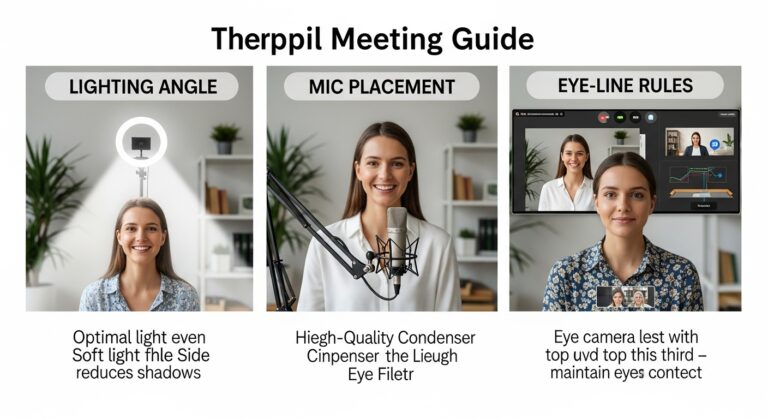
- Rule of Thirds: Frame your eyes near the top third of the screen for a balanced, confident presence.
Last Updated: December 31, 2025 |
Expert Review: WorkNest Visual Lab |
Author: WorkNest Team
Choosing the best webcams for video meetings is not about chasing the highest resolution.
In real remote work environments, perceived professionalism comes from angle, lighting, and framing far more than raw megapixels.
I learned this the hard way after upgrading to an expensive webcam and still looking tired on calls.
The camera wasn’t the issue. Once I fixed eye-level placement and lighting direction,
even a mid-range webcam delivered noticeably better results. A clearer, more stable image can also make calls feel less “effortful,”
because people read non-verbal cues more easily when the picture isn’t dark or distorted.
Table of Contents
- 1. Why Setup Matters More Than Resolution
- 2. Webcam Height and Eye-Level Alignment
- 3. Lighting Setup: The “Catchlight” Detail
- 4. Webcam Angle and Face Distortion
- 5. Built-in Laptop Camera vs External Webcam
- 6. FAQ (Frequently Asked Questions)
- 7. Related Guides (Internal Links)
- 8. Sources & References
1. Why Webcam Setup Matters More Than Resolution
Human perception is incredibly sensitive to facial proportions. When a webcam sits too low, it creates a low-angle distortion:
chin and nostrils look exaggerated, and the face can appear heavier or less approachable—regardless of how many pixels your camera has.
Here’s the practical truth: for meetings, you want clarity + comfort. A stable image with good lighting reduces visual strain,
and it makes you look more awake even on an average day. That’s why 1080p + good light often beats “better specs” in a dark room.
Quick “Best Webcam” Checklist (Specs that actually matter)
- 1080p at 30 fps: the sweet spot for most platforms and internet connections.
- Field of view (FOV): avoid ultra-wide unless your camera sits farther away (wide lenses exaggerate faces up close).
- Autofocus quality: reliable continuous focus helps if you move while talking (cheap autofocus “pumps”).
- Low-light noise: if you work at night, prioritize cleaner shadows (or fix lighting first).
- Mounting options: tilt control and tripod thread make eye-level placement easy.
- Manual controls: exposure/white balance controls help you avoid washed-out skin tones.
2. Webcam Height and Eye-Level Alignment
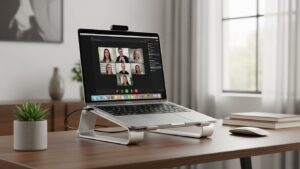
The single most important adjustment is height. Your webcam lens should sit at or slightly above eye level.
Simple fix: if you’re using a laptop camera, raise the entire laptop (stand/books) so the lens meets your eye line.
Looking “down” at colleagues can feel subtly unequal, while a level camera creates a more natural face-to-face vibe.
3. Lighting Setup: The “Catchlight” Detail
Lighting quality has more impact than webcam price. Soft, diffused light placed in front of you creates small reflections in the eyes (“catchlights”),
making you look more alert and present—even if you slept badly.
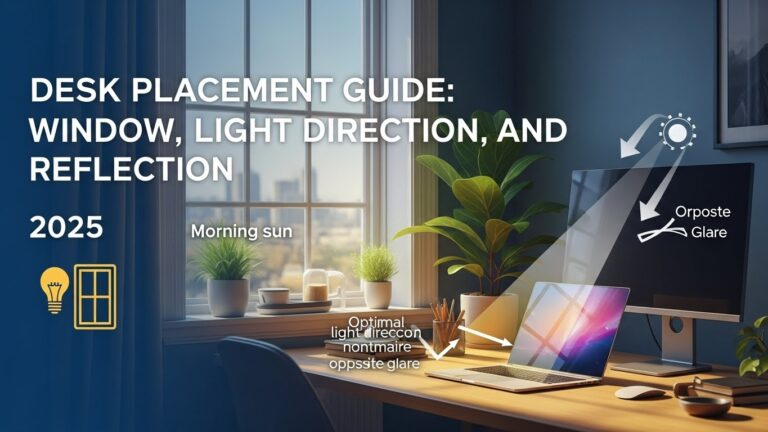
- Avoid backlighting: a bright window behind you creates a silhouette effect.
- Diffused light: if you use a ring light, keep it moderate and slightly above eye level.
- 45-degree placement: place your main light about 45° to the side and slightly above eye level for natural facial depth.

4. Webcam Angle and Face Distortion
Extreme wide-angle lenses (common in cheaper webcams) placed too close to your face can warp proportions.
Keep the camera at least arm’s length away when possible, and avoid a steep angle from below.
Best practice: straight-on or a slight downward tilt, with the lens near eye level. If you can only do one thing today, do that.
5. Laptop Camera vs External Webcam
| Feature | Laptop Camera | External Webcam |
|---|---|---|
| Sensor & low light | Typically smaller (grainy in dim rooms) | Often better shadows with decent lighting |
| Autofocus | Fixed or slower | More reliable on mid/high models |
| Mounting | Locked to screen lid | Tilt control + often tripod-ready |
6. FAQ (Frequently Asked Questions)
Q1. Is 4K necessary for Zoom or Microsoft Teams?
A. Generally, no. Many meeting platforms compress video. A clean 1080p image with good light is usually the smarter choice.
Q2. How do I fix a grainy webcam image?
A. Graininess is almost always “not enough light.” Add a soft front light or face a window. Your camera is trying to digitally brighten a dark scene.
Q3. Should I use a virtual background?
A. Use it only if your real background is cluttered. A tidy real background with depth usually looks more natural.
Q4. My webcam makes me look washed out. Why?
A. Often overexposure: your screen is too bright, or the light is too close. Lower screen brightness or move the light slightly farther away.
7. Related Guides (Internal Links)
Monitor Distance and Eye Level Guide
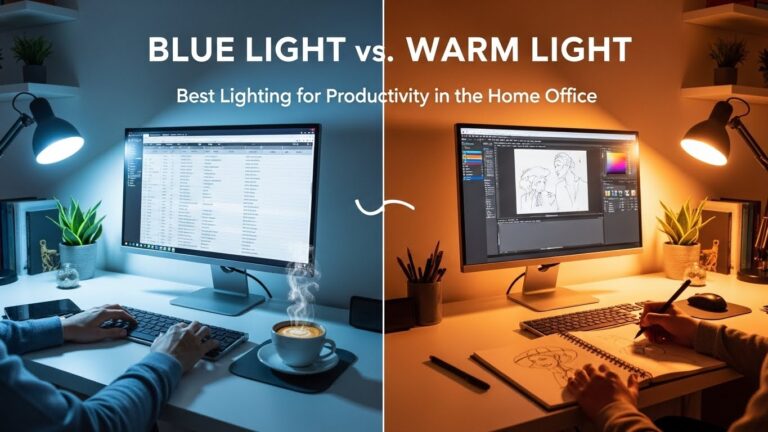
LED Desk Lamp Guide
Desk Placement Guide
8. Sources & References
- NIOSH – Ergonomics (general workstation risk factors)
- NIH (PubMed Central) – Visual fatigue and screen use research
Professional Disclaimer: This article is for informational purposes only and does not replace professional medical or occupational health advice.
If you experience persistent eye strain, headaches, or visual discomfort during video calls, consult a qualified professional.

I’m not a medical professional, ergonomist, or workplace specialist.WorkNest exists to help everyday people build more comfortable, practical home office environments through clear explanations, visual guides, and common-sense adjustments.
Articles on this site are written from a non-expert perspective, focusing on real-world use, everyday discomforts, and widely accepted setup principles rather than clinical or professional advice.