armrest height to stop shoulder shrugging: the trapezius reset protocol for fast typing
What armrest height actually stops shrugging — without slowing your hands?
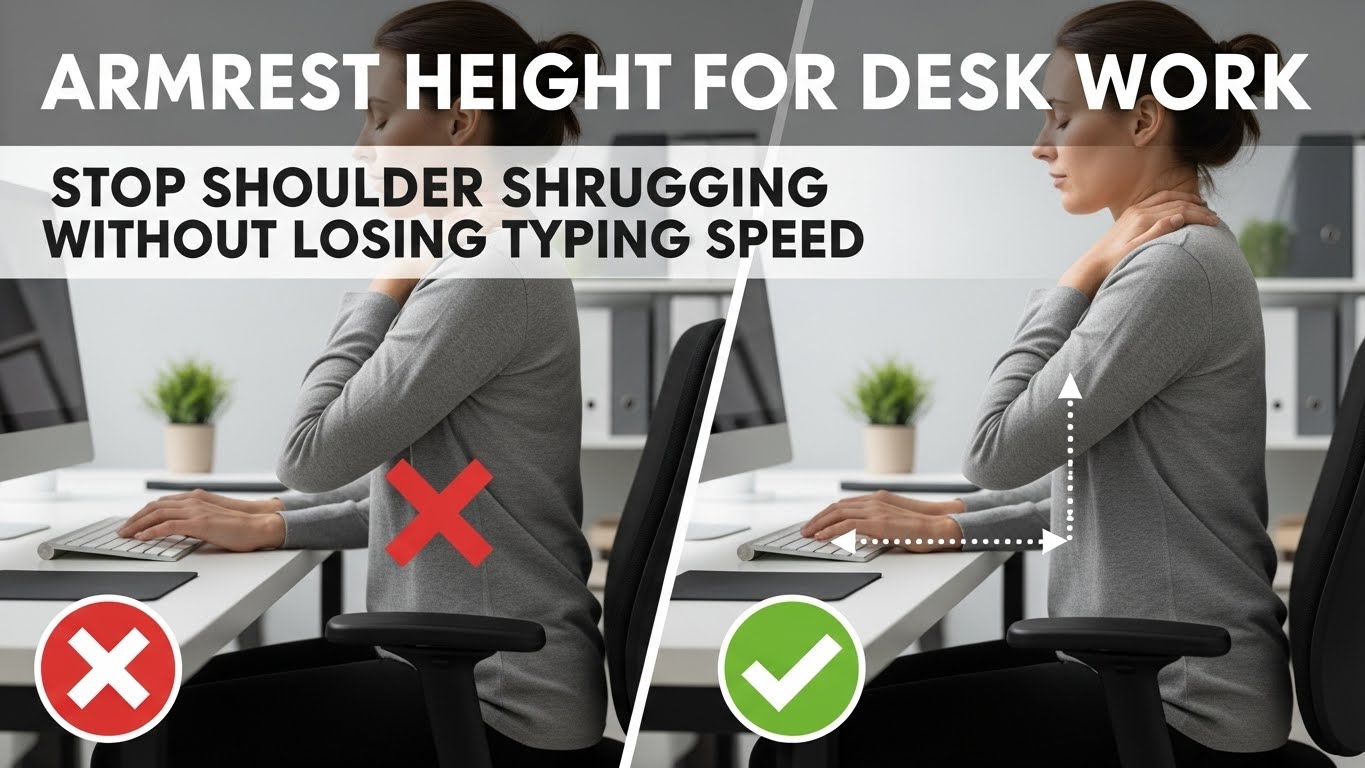
The most reliable default is the Trapezius Reset: exhale, let your shoulders drop, then raise armrests until they give light contact under the forearm/elbow area
without lifting the shoulders. If armrests are even a bit too high, your shoulder blades drift upward (shrugging).
If they’re too low, you hover your arms and fatigue builds — then wrists and forearms start compensating.
- Height target (human test): armrests “meet” your forearms after the exhale drop — no shoulder rebound
- Speed target: elbows stay within a natural body line (avoid outward flare that slows hand travel)
- Contact target: support forearm/elbow zone, not a hard pressure point (avoid ulnar-nerve-style irritation)
- Desk trap: if armrests hit the desk and push you away, you’ll reach more — that’s worse than no armrests
- Shoulders rise the moment you start typing (or one shoulder sits higher)
- Upper-trap tightness ramps up by afternoon
- Numbness/tingling that persists or worsens (especially fingers)
- You keep sliding forward because the desk feels “too far away”
If symptoms persist or worsen, consider professional evaluation. This guide is educational and not medical advice.
Last Updated: 2026-01-10 |
Expert Review: WorkNest Ergonomic Lab |
Author: WorkNest Team
- Sit back first: hips back, ribs stacked (don’t perch on the edge).
- Drop shoulders: slow exhale and let shoulders fall naturally.
- Raise from low: bring armrests up until you feel light forearm support — no shoulder lift.
- Elbows in: if elbows flare outward, lower armrests or narrow/rotate them inward (if adjustable).
- No-push rule: you shouldn’t push down on armrests to reach keyboard/mouse.
Armrest height looks like a small detail, but it’s one of those “quiet multipliers”:
it can change shoulder tension, wrist strain, and even typing speed without you noticing until the end of the day.
This guide merges two approaches: real-work feel (speed + comfort) and biomechanics (scapular position + reach geometry).
Table of Contents
- 1) Why armrest height affects typing speed (not just comfort)
- 2) The two failure modes: shrugging vs hovering
- 3) The Trapezius Reset Protocol (no ruler required)
- 4) The width problem: abduction flare and “mouse island”
- 5) Task tuning: typing-heavy vs mouse-heavy vs mixed
- 6) The Gap Trap: when armrests hit the desk (and what to do)
- 7) Comparison table: good vs bad signals you’ll feel
- FAQ
- Internal Links
- Sources & References
- Professional Disclaimer
1) Why armrest height affects typing speed (not just comfort)
Typing speed is partly a finger skill — but it’s also a stability problem.
If your shoulders are “on” (shrugging), your brain spends effort stabilizing posture.
If your arms hover (too low), you fatigue early and wrists start doing extra work.
The speed-friendly posture is boring: shoulders calm, elbows near your sides, and forearms supported just enough that your hands can move
quickly without bracing or “hunting” for support.
2) The two failure modes: shrugging vs hovering
- Too high (shrugging): shoulders lift, upper traps stay tight, and your neck feels “busy” all day.
- Too low (hovering): arms float, forearms burn, and precision work makes wrists compensate.
If your shoulders can’t drop naturally during a slow exhale because the armrests “catch” them, your armrests are too high.
3) The Trapezius Reset Protocol (no ruler required)
Forget measuring tape. Use your resting muscle tone.
You’re trying to find the height where armrests provide light support without changing your shoulder position.
A helpful mental model: the armrest should feel like a “soft floor” under the forearm — not a “jack” lifting the shoulder.
- Reset: sit fully back, slow exhale, let shoulders gravity-drop.
- Hands to home row: elbows hang naturally near your ribs (don’t flare).
- Raise slowly: bring armrests up until you feel light tactile contact under forearm/elbow zone.
- Shoulder check: if shoulders lift back up, drop armrests one notch.
- 30-second test: type + mouse. If you start pushing down on armrests, geometry is off.

4) The width problem: abduction flare and “mouse island”
Height is only half the story. Armrest width can quietly ruin a “perfect height” by pushing elbows outward.
Outward elbows often lead to longer hand travel and awkward wrist angles — and mouse work becomes a reach to a separate island.
- Good: elbows stay near torso; mouse lives next to keyboard.
- Bad: armrests force elbows outward; mouse sits far right/left; one shoulder works harder.
- Simple fix: if your chair supports it, slide/rotate armrests inward. If not, prioritize bringing mouse closer and reducing reach.
Fix reach geometry before you chase “more cushion” or “more support.”
5) Task tuning: typing-heavy vs mouse-heavy vs mixed
One height rarely feels perfect for every task. Use a baseline, then tune by your dominant workload:
| Work type | What to prioritize | Common mistake |
|---|---|---|
| Typing-heavy | elbows in + free hand travel | armrests too high → shrugging |
| Mouse-heavy | forearm support + neutral wrist | mouse too far → shoulder load |
| Mixed | balanced height + minimal reach shifts | desk too far because armrests hit it |
6) The Gap Trap: when armrests hit the desk (and what to do)
This is the most common real-world failure:
armrests collide with the desk edge, so you sit farther away — then you reach forward all day.
That reach can be more harmful than simply using lower armrests or none at all.
- Best fix: lower armrests enough to slide under the desk (or slide them backward if your chair allows).
- If you can’t: consider temporarily lowering/removing armrests, then prioritize desk height + input proximity + forearm support zone.
- Don’t do this: keep high armrests and compensate by leaning forward — it creates a daily neck-tax.

7) Comparison table: good vs bad signals you’ll feel
| Signal | Setup is drifting | Setup is stable |
|---|---|---|
| Shoulders | lifting / shrugging while working | heavy, relaxed shoulders |
| Elbows | flare outward, wide posture | stay near torso line |
| Typing feel | hands feel slower/heavier | fast travel, less effort |
| End of day | upper-trap tightness ramps up | you forget armrests exist |
| Desk distance | you sit farther away to “fit” armrests | keyboard/mouse feel close and easy |
FAQ
Q1) Should my forearms rest fully on the armrests while typing?
A) Usually no — light support is the goal. If full resting makes shoulders lift or elbows flare outward, lower the rests or narrow the setup.
Q2) My armrests hit the desk and force me to sit far back. What’s the best fix?
A) Lower them to slide under the desk if possible. If you can’t, consider lowering/removing armrests and prioritize proximity + desk height.
Reaching forward all day is typically the bigger problem.
Q3) Why do I type slower when I use armrests?
A) Most often the rests are too high (shrugging) or too wide (elbows outward).
Lower slightly and bring elbows back toward your body line.
Q4) Should armrest height be different for mouse-heavy work?
A) Sometimes you’ll prefer slightly more forearm support for mouse work — but never at the cost of shrugging.
Keep mouse close to the keyboard to reduce reach first.
Q5) Do armrest pads help?
A) They can reduce contact discomfort, but only if they don’t effectively raise the height and trigger shoulder lift.
If padding changes your shoulder position, it’s not a win.
Internal Links
Office Chair Guide: How to Choose the Right Chair for 8-Hour Workdays
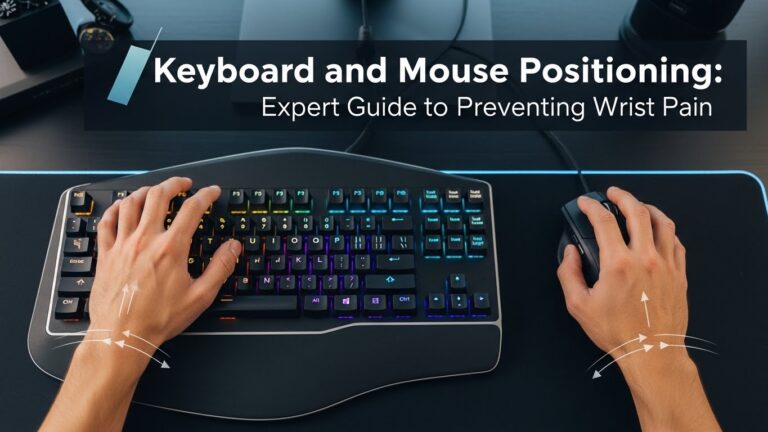
Keyboard and Mouse Positioning: Wrist Pain Prevention Guide for Long Workdays
Desk Height by Body Height: Complete Guide to Correct Ergonomic Setup
Sources & References
- OSHA — Computer Workstations eTool: Chairs
- NIOSH (CDC) — Ergonomics and Musculoskeletal Disorders
- HSE — Working safely with display screen equipment (DSE)
Professional Disclaimer
If you have persistent pain, numbness, tingling, weakness, or worsening symptoms, consult a qualified clinician or ergonomics professional.
Update Log:
– 2026-01-07: Merged real-work speed framework with the Trapezius Reset protocol, expanded width + Gap Trap troubleshooting, and added task-based tuning + signal table.

I’m not a medical professional, ergonomist, or workplace specialist.WorkNest exists to help everyday people build more comfortable, practical home office environments through clear explanations, visual guides, and common-sense adjustments.
Articles on this site are written from a non-expert perspective, focusing on real-world use, everyday discomforts, and widely accepted setup principles rather than clinical or professional advice.