Home Office Setup for Creators: Dual Monitor + Camera + Desk Space Planning
What’s the best “creator” desk layout if you use dual monitors and a camera?
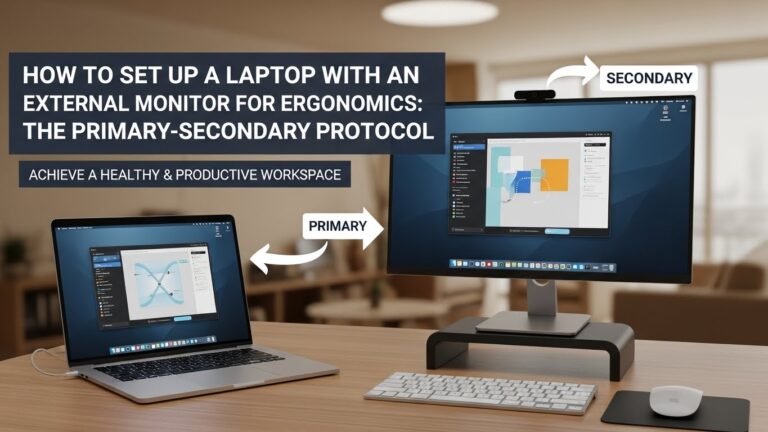
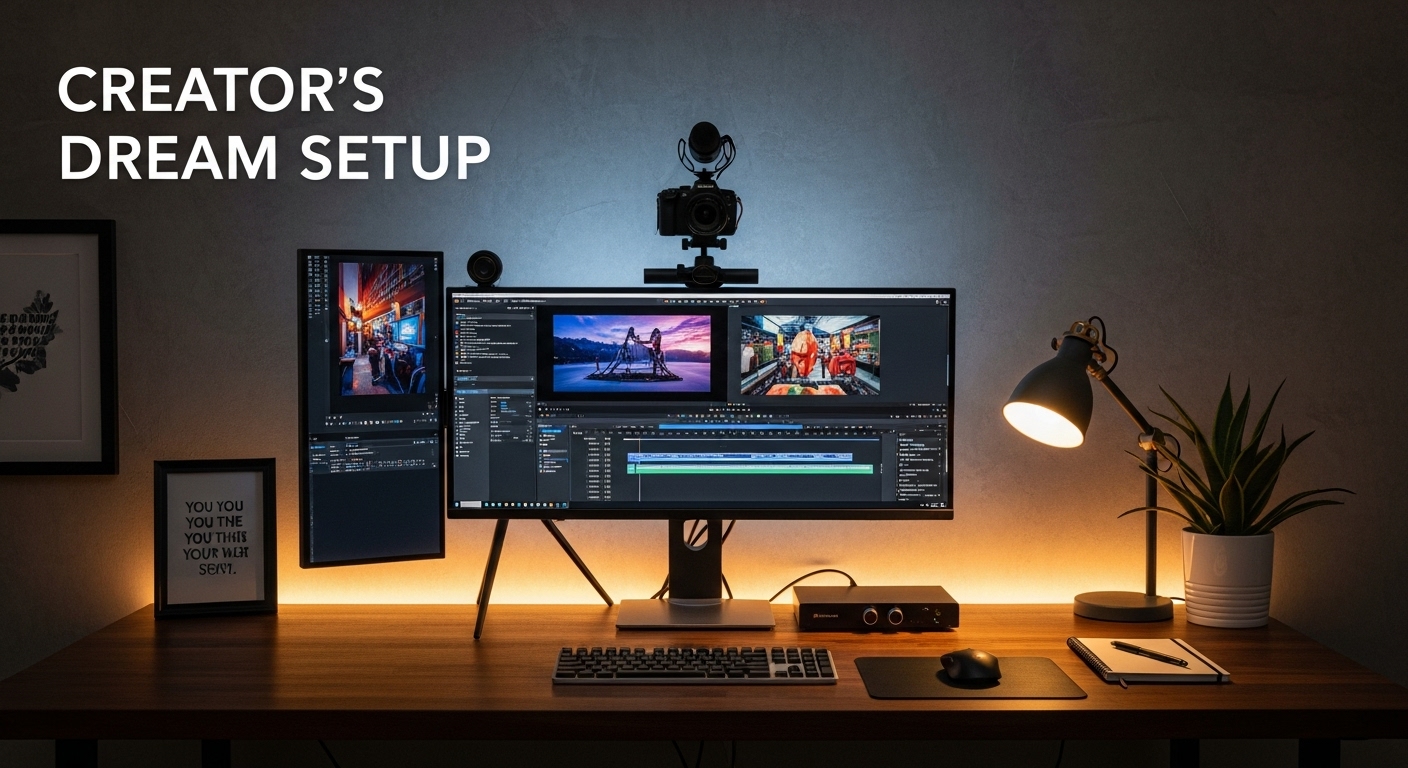
Use a Vertical-Axis Triangle: (1) main monitor centered, (2) camera stacked on the same vertical line,
(3) side monitor angled in as a “glance screen.” This layout keeps your work gaze and camera gaze close,
so you don’t twist your neck to “perform,” and you don’t rebuild your desk every time you record.
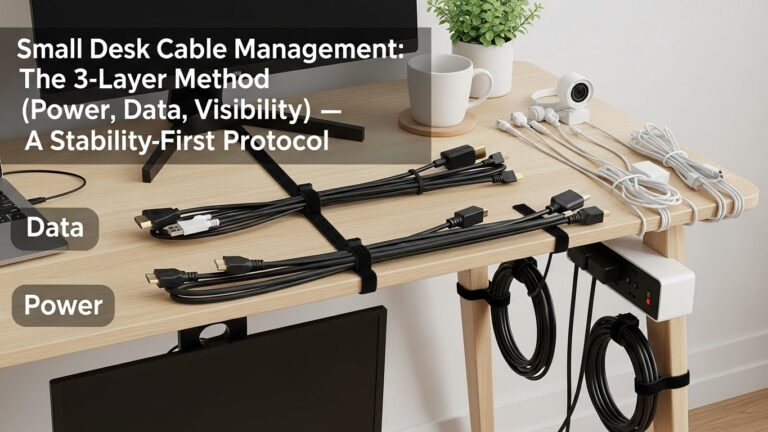
- Parallax rule: camera sits above (or tight to) the main screen where your eyes naturally go
- 30° limit: keep your side monitor within a small head turn (ideally 15–30°) so it stays “glance-only”
- Reach-zone rule: put high-frequency tools (mouse, macro pad, stream controls) inside your neutral reach so wrists don’t brace
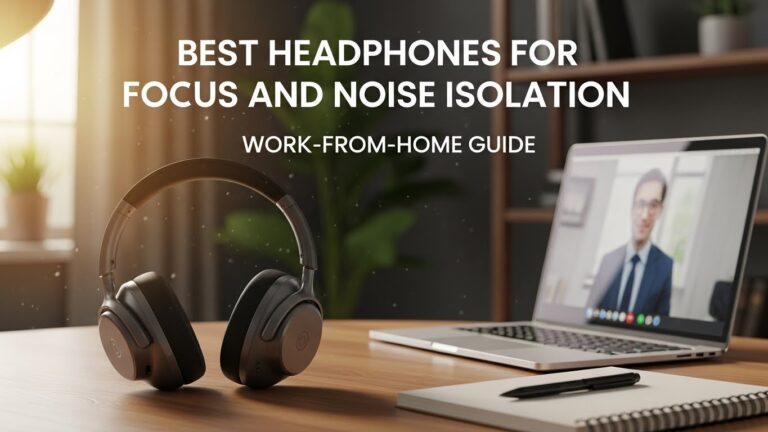
- Lighting sanity: side-front key light + controlled glare (glare is silent fatigue)
- Stability wins: cable slack + clean routing prevents tiny tugs that slowly wreck camera alignment
- Headaches, burning eyes, or “pressure” that ramps up during editing sessions
- Neck pain that shows up mostly on record days (camera/side monitor geometry problem)
- Numbness/tingling, grip weakness, or wrist pain after shortcut-heavy work
- Hot power bricks / warm cable bundles under the desk (heat + safety + focus hit)
If symptoms persist or worsen, get professional help. This guide is informational, not medical advice.
Last Updated: 2026-01-21 |
Expert Review: WorkNest Ergonomic Lab |
Author: WorkNest Team
- Main monitor = center: your nose points to the center of your primary editing screen.
- Camera stacks to the main screen: lens sits as close to the main monitor bezel as possible (vertical line).
- Side monitor stays “glance-only”: angle it inward; if you keep turning your torso, it’s too dominant.
- Hands stay close: keyboard + mouse where elbows can stay near your ribs (no reaching forward).
- Glare + reflection check: if you see a light or window reflected on the screen, fix the light direction first.
- Cable slack: leave a small service loop near camera/mic so adjustments don’t tug alignment over time.
Creator desks are weird because they’re not one desk. They’re a multi-job stage.
One hour you’re editing, the next hour you’re recording, then you’re back to admin, then a call.
When the layout isn’t built for switching, your setup “drifts” in tiny ways: the camera ends up a little off,
your side monitor steals your neck, your cables start tugging your mic arm, and your wrists quietly brace on the desk edge.
This guide is built around one goal: stable geometry.
Stable means your work gaze and camera gaze live in the same neighborhood,
your tools live in predictable zones, and your desk doesn’t punish you for doing real creator work for real hours.
Table of Contents
- 1) Pick your primary job (edit-heavy vs meeting-heavy vs recording-heavy)
- 2) The Vertical-Axis Triangle (main monitor + camera + side monitor)
- 3) Lighting that protects your eyes and still looks good on camera
- 4) Desk space planning with zones (so clutter doesn’t steal your wrists)
- 5) Cables + audio placement (less desk noise, fewer “mystery problems”)
- 6) Monthly reset checklist (12-point stability routine)
- Comparison table: stable vs drifting creator setups
- FAQ
- Internal Links
- Sources & References
- Professional Disclaimer
1) Pick your primary job (edit-heavy vs meeting-heavy vs recording-heavy)
Copying a generic dual-monitor diagram is how creators end up with a desk that looks “right” but feels wrong.
The missing step is choosing your primary job — the thing you do most hours per week.
Your desk should protect the movement pattern you repeat the most.
Edit-heavy: main monitor gets the “prime real estate” dead center. Side monitor supports (bins/chat/reference).
Meeting-heavy: camera eye-line + flattering light takes priority over perfect editing symmetry.
Recording-heavy: build a small “performance lane” (camera/light/mic stability) so record days don’t wreck edit days.
If you’re a hybrid creator (most people are), aim for a layout that can shift modes without a full teardown.
That usually means monitor arms (or at least a riser + consistent camera mount) and a desk zoning system that keeps tools in predictable places.
2) The Vertical-Axis Triangle (main monitor + camera + side monitor)
The #1 creator mistake is letting the camera land “somewhere.” Then your real gaze goes somewhere else.
You read chat on the side monitor while the camera sits above the center screen… so you twist, fake eye contact, or over-rotate your shoulders.
It’s subtle. It adds up.
The fix is simple geometry:
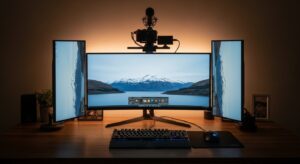
main monitor straight ahead (work), camera stacked above it (presence), and side monitor angled in (support).
The side monitor must remain a peripheral reference. If it becomes your “real screen,” your neck pays for it.
Keep your hips and chair facing forward. Now do your normal workflow for 30 seconds.
If you catch yourself turning your whole torso to use the second monitor, your side screen is too far, too flat, or too central to your workflow.
Pro tip: Put “people” and “performance” near the camera. That means your script notes, live chat, or talking points should live
on the main screen near the top-center when you’re recording. That one change shrinks gaze drift without forcing you to stare at the lens nonstop.
3) Lighting that protects your eyes and still looks good on camera
Creator lighting fails in two ways:
it looks good on camera but feels harsh to edit under, or it feels comfy to edit under but makes your camera image look flat and noisy.
The solution isn’t “more brightness.” It’s direction + balance.
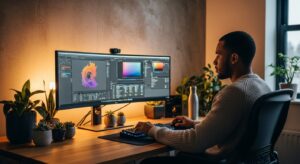
- Key light: place your strongest light at side-front (not straight-on, not behind screens).
- Ambient fill: don’t edit in a cave. A little background light reduces the contrast jump between bright screens and dark walls.
- Bias light: a gentle light behind the monitor can make long sessions feel calmer by preventing the wall from becoming a dark void.
Turn your monitors dark (black screen) and keep your room lights on. If you can see a bulb or window reflected on the dark screen,
that reflection will show up as “quiet glare” during real work. Move the light source, diffuse it, or change the angle until the hot reflection disappears.
If you wear glasses, move the key light a little more to the side and slightly higher.
You’re trying to bounce reflections away from the camera angle, not “blast” your face.
Small moves beat expensive gear here.
4) Desk space planning with zones (so clutter doesn’t steal your wrists)
Creators keep more “small tools” within reach than most people: external drives, audio knobs, camera controls, notes, chargers, macro pads.
When everything lives everywhere, your hands start hunting… and that’s when wrists brace, shoulders lift, and posture slips.
The fix is zoning by frequency. This is basically the real-world version of Fitts’s Law:
the more often you touch something, the closer it should live.
You’re not aiming for minimalism. You’re aiming for predictability.
| Zone | What belongs here | Why it helps |
|---|---|---|
| Core zone (closest) | keyboard, mouse, macro pad, primary shortcuts | keeps elbows near body; reduces wrist bracing on desk edge |
| Action zone (side sweep) | audio controls, notebook, camera remote, stream controls | easy forearm sweep without reaching forward or shrugging shoulders |
| Parking zone (far) | chargers, spare cables, extra drives, accessories | prevents “desktop cable nest” and visual noise |
Creators push the keyboard forward to “make room,” then rest wrists on the desk edge for hours.
If your wrists feel heavy or compressed, bring the keyboard closer and clear the Core zone first.
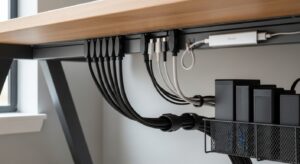
5) Cables + audio placement (less desk noise, fewer “mystery problems”)
Cable management for creators isn’t about looking clean. It’s about stability.
Loose cables tug microphones, pull cameras out of level, and create tiny vibrations that show up as “desk noise.”
The goal is: no surprise movement.
- Separate runs: bundle power together and data/audio together. If they must cross, cross at 90°.
- Give the mic a quiet lane: avoid routing mic cables where they rub the desk edge or snag when you shift posture.
- Leave a service loop: keep a small slack loop near the camera and mic so angle tweaks don’t tug your setup over time.
- Heat check: warm is normal, “too hot to touch” isn’t. Don’t bundle bricks tightly; give airflow.
If you record audio at the desk, prioritize proximity and isolation:
keep the mic close enough that you can speak calmly, and avoid placing it on the same surface that takes typing impacts.
Even small improvements here can reduce the need for heavy software processing later.
6) Monthly reset checklist (12-point stability routine)
Creators don’t need a perfect setup. They need a setup they can restore.
Use this checklist once a month (or after a big rewire) to stop “drift” before it becomes pain or frustration.
- Main monitor centered: primary editing view straight ahead.
- Camera aligned: lens stacked on the main monitor’s vertical line.
- Side monitor stays angled: glance-only, not the primary work screen.
- 30° check: side monitor does not require a big head turn.
- Meeting/script placement: when recording, move key notes near the top-center of the main screen.
- Key light direction: side-front, not behind screens.
- Reflection test passes: no obvious bulb/window reflection on dark screen.
- Hands stay close: mouse next to keyboard; elbows stay near body.
- Wrist pressure test: no constant desk-edge pressure while working.
- Audio lane stays clean: mic cables don’t scrape or tug during normal movement.
- Service loop exists: slack near camera/mic so adjustments don’t pull alignment.
- Heat check: power bricks have airflow; not tightly bundled.
Comparison table: stable vs drifting creator setups
| Signal | Setup is drifting | Setup is stable |
|---|---|---|
| Camera presence | lens “somewhere,” you look away or twist to perform | lens stacked to main screen; gaze drift is minimal |
| Neck & shoulders | torso turns toward the side monitor; one-sided tension | side monitor is glance-only; body stays mostly forward |
| Eyes & focus | glare/reflections, high contrast, fast fatigue | controlled reflections; balanced room light |
| Workflow | desk becomes a pile; tools constantly move | zoned layout; tools return to predictable places |
| Stability | cables tug; mic/camera alignment slowly changes | service loops + clean routing; fewer “mystery problems” |
FAQ
Q1) Should my camera be centered above the main monitor?
A) Most of the time, yes. Centering above the main monitor keeps the camera aligned with where your eyes naturally go, which reduces neck twisting and “fake eye contact.”
Q2) Is it okay to put chat or script on the side monitor?
A) Yes — if it stays glance-only. If you notice frequent torso turns, move the side monitor closer, angle it inward, or move “must-read” content to the main screen during recording.
Q3) Why does a split-center (two monitors meeting in the middle) feel bad?
A) Because your “neutral” position becomes a micro-turn. Over hours, that small rotation can build one-sided neck and shoulder fatigue. One true center is usually the safer baseline.
Q4) My lighting looks great on camera but my eyes feel cooked. What’s happening?
A) Usually glare or contrast. Fix light direction first (side-front), then reduce reflections, then add gentle ambient/bias lighting so screens aren’t glowing against a dark room.
Q5) How do I know my desk zoning is working?
A) If you can reach your mouse/shortcuts without leaning forward, and you stop “hunting” for small tools during editing. Predictability is the sign.
Q6) When should I stop tweaking and get professional help?
A) If you have persistent numbness/tingling, grip weakness, worsening headaches, or pain that escalates week to week, consider a qualified evaluation rather than endless setup experiments.
Internal Links
Dual Monitor Setup Guide: Height, Distance, and Rotation Rules
Best Webcams for Video Meetings: Lighting, Angle, and Real-World Setup
Best Microphones for Home Office Calls and Meetings (2025)
Sources & References
- OSHA — Computer Workstations eTool
- NIOSH (CDC) — Ergonomics and Work-Related Musculoskeletal Disorders
- HSE — Display Screen Equipment (DSE) Guidance
Professional Disclaimer
If you have persistent pain, numbness, tingling, headaches, vision symptoms, or worsening discomfort, consult a qualified professional.
Update Log:
– 2026-01-21: Rebuilt the guide around the Vertical-Axis Triangle (main monitor + camera + side monitor), added zoning-by-frequency desk planning, expanded glare/reflection auditing, and tightened cable stability rules for long-term setup consistency.
I’m not a medical professional, ergonomist, or workplace specialist.WorkNest exists to help everyday people build more comfortable, practical home office environments through clear explanations, visual guides, and common-sense adjustments.
Articles on this site are written from a non-expert perspective, focusing on real-world use, everyday discomforts, and widely accepted setup principles rather than clinical or professional advice.