Home Office Setup for Video Meetings: Lighting Angle + Mic Placement + Eye-Line Rules
Last Updated: 2026-01-21 |
Expert Review: WorkNest Ergonomic Lab |
Author: WorkNest Team
What’s the fastest way to look clear and sound confident on video calls (without buying new gear)?
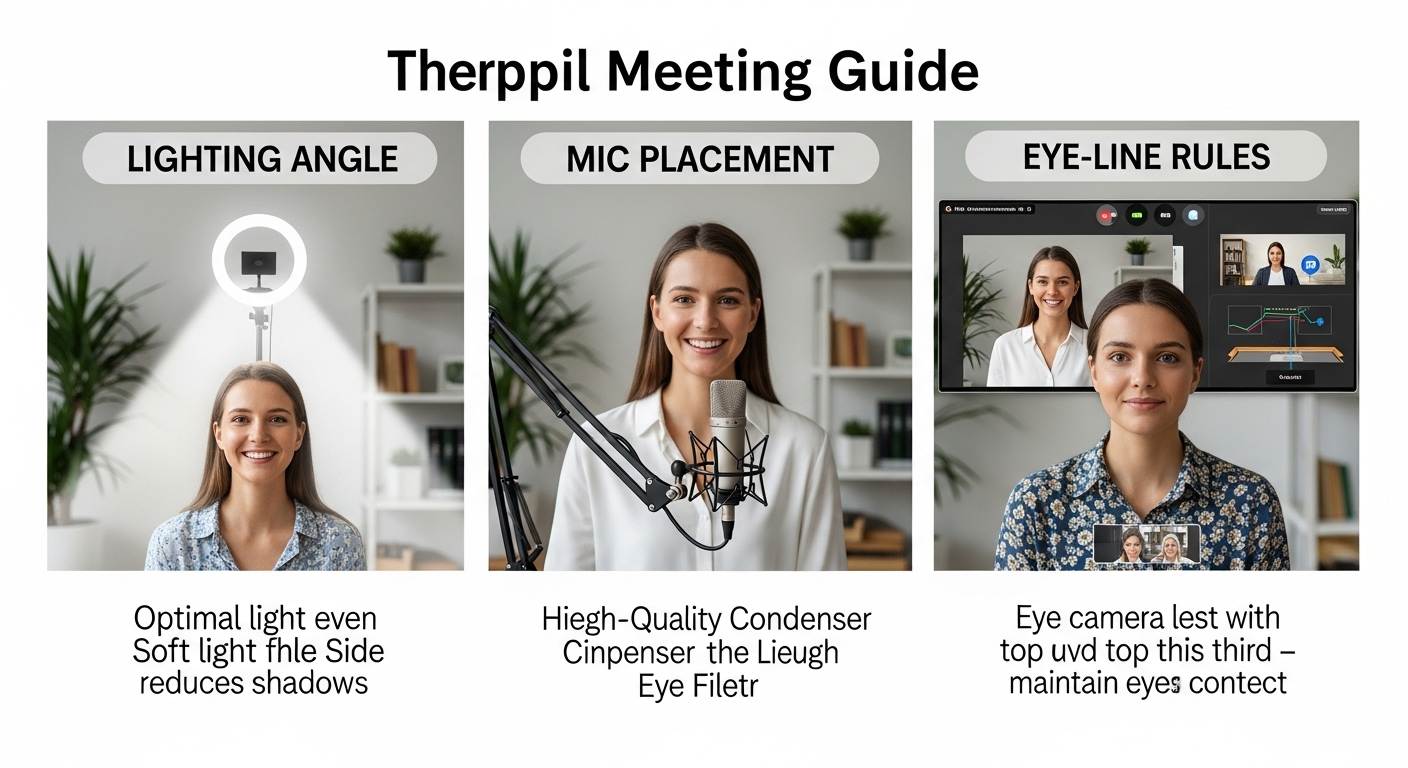
Fix the 3-angle stack first: (1) eye-line at camera height, (2) soft light from a side-front angle,
and (3) mic distance close enough that you can speak calmly. If one angle is off, you’ll compensate (lean forward, squint, talk louder),
and the call gets tiring fast.
- Eye-line: camera near eye level + keep the meeting window near the camera so your gaze doesn’t “drift.”
- Lighting: avoid window behind you; aim for side-front 30–45° light for softer shadows.
- Mic: the best upgrade isn’t “louder,” it’s closer (less echo, less strain).
- Quick win: if you look tired on camera, it’s usually down-angle + shadows + glare—not your face.
- Leaning forward to be seen/heard (neck + low-back fatigue by hour 2)
- Turning your head to avoid glare (one-sided shoulder tension)
- Speaking louder because the mic is far away (throat strain + harsher tone)
This guide focuses on changing the setup so your body can stay neutral during meetings.
- Camera: lift it to eye level (stack books or use a riser). Avoid the “laptop nose-cam” angle.
- Light: place soft light at side-front 30–45° (or rotate so the window is beside you, not behind you).
- Mic: bring it closer than you think (about a hand-span to forearm length), slightly off to the side to avoid breath pops.
- Frame: eyes around the top third of the image, a little headroom, background 3–6 feet behind you if possible.
- Test: record 10 seconds. If your voice sounds “roomy,” move the mic closer before touching any settings.
“Bad video calls” feel like a gear problem, but most of the time it’s a geometry problem: wrong angle, wrong light direction,
wrong distance. Then you spend the whole meeting doing invisible work—leaning in, raising your voice, squinting at glare.
The goal here is simple: a setup that makes you look awake, sound clear, and stay neutral for long calls. We’ll focus on what actually changes outcomes:
lighting angle, mic placement, and eye-line rules that keep your gaze believable.
Table of Contents
- 1) The 3-angle stack that fixes most bad calls
- 2) Lighting angle rules (shadows, glare, backlight)
- 3) Eye-line rules (how to look like you’re making eye contact)
- 4) Mic placement rules (clear voice without shouting)
- 5) Background + framing that looks “clean” in small rooms
- 6) 10-minute setup checklist + troubleshooting
- Comparison table: drifting vs stable signals
- Common mistakes (and quick fixes)
- FAQ
- Internal Links
- Sources & References
- Professional Disclaimer
1) The 3-angle stack that fixes most bad calls
If your calls feel “off,” don’t start with software settings. Start with angles. Most issues come from one of these:
(A) light angle creating harsh shadows or backlight,
(B) camera angle making you look down or distant,
or (C) mic distance forcing you to project.
Think of it like this: your face is a 3D object, and your voice is a signal traveling through a room.
When the light is overhead, you get eye-socket shadows. When the camera is low, you look disengaged even when you’re focused.
When the mic is far, the room becomes part of your voice. Fix the geometry first—then fine-tune if you want.
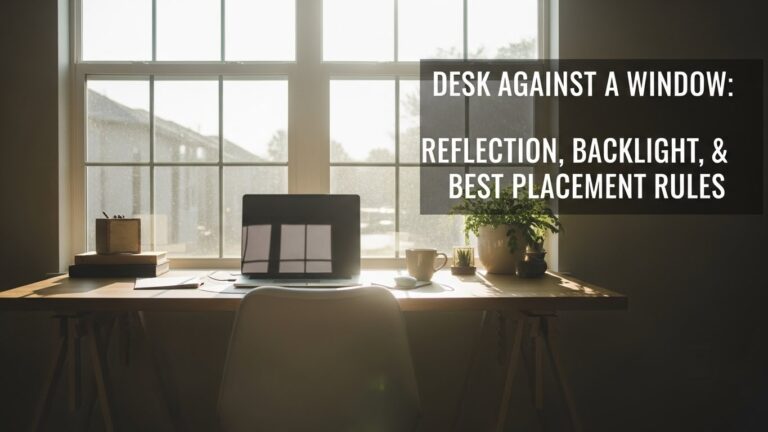
2) Lighting angle rules (shadows, glare, backlight)
Most people chase brightness. What you actually want is soft, stable contrast.
That usually comes from a side-front light (about 30–45 degrees from your face),
not a harsh overhead ceiling light and not a bright window behind you.
Turn your camera on. Put your hand under your eyes like a tiny visor.
If you suddenly look more “awake,” your light is probably too high/overhead and creating shadows.
Move light lower and to the side-front.
- Avoid backlight: a window behind you makes the camera protect highlights, so your face turns dark.
- Side-window is the sweet spot: rotate your desk so the window is beside you, not behind you.
- Soften the source: bare bulbs are harsh. A lampshade, diffuser, or bouncing light off a wall helps.
- If you wear glasses: move the light slightly higher and more to the side until glare disappears from the lenses.
- Monitor spill (blue face): if your screen is very bright, it becomes a light source. Lower brightness and rely on the side-front light instead.
Put the window to your side and add a soft lamp on the opposite side-front. You’ll get facial depth without harsh shadows,
and your camera won’t constantly “hunt” exposure.
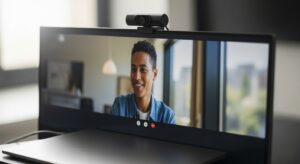
3) Eye-line rules (how to look like you’re making eye contact)
On video calls, “eye contact” is mostly a camera placement trick. If your camera sits below your eyes (typical laptop setup),
you’ll look downward. If your meeting window is far from the camera, your eyes drift and people feel it.
- Camera at eye level: raise laptop/monitor until the lens is near your eye line.
- Bring faces near the camera: move the meeting window up toward the top-center of the screen.
- Use lens glances: look into the lens when you deliver key lines, then return to the screen.
- Limit off-screen talking: if your call is on a side monitor, your gaze will look “away.” Put the call on your main screen.
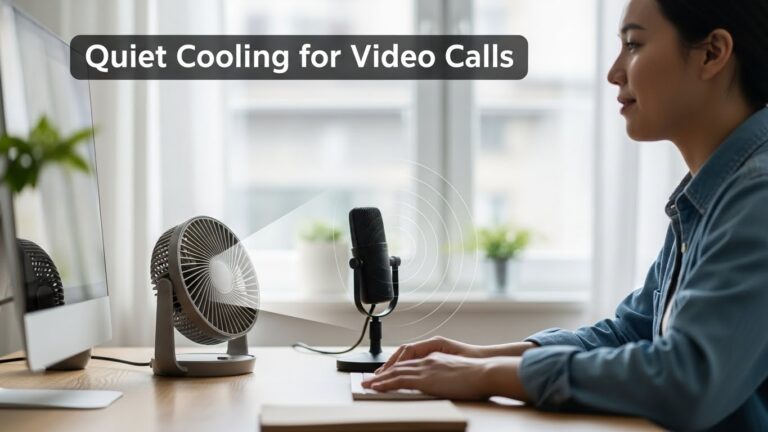
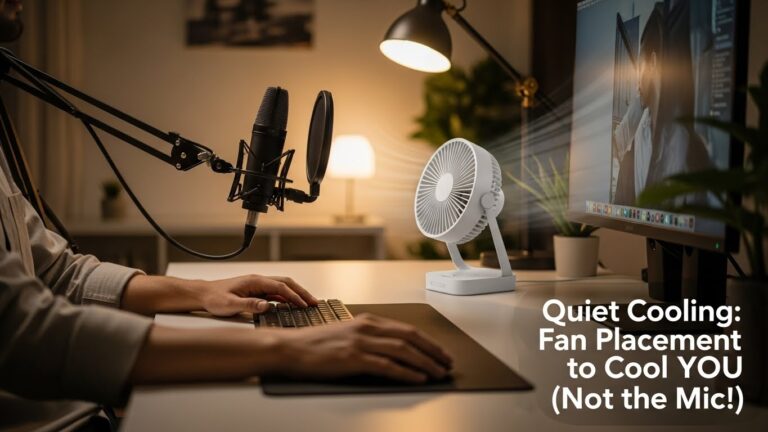
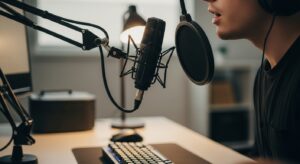
4) Mic placement rules (clear voice without shouting)
If your audio sounds “far,” the fix is usually not fancy settings. It’s distance.
The farther the mic is from your mouth, the more your room (echo, fan noise, keyboard clicks) becomes part of your voice.
A modest mic placed well often beats an expensive mic placed far away.
- Distance: about a hand-span to forearm length (close enough that you can speak softly).
- Angle: slightly off to the side of your mouth (reduces breath pops).
- Height: near mouth level (avoid “mic on the desk pointing at your chest”).
- Keyboard noise: don’t aim the mic at the keys; rotate it away and keep it off-axis.
- Desk vibration: if possible, isolate the mic from the desk (even a simple arm/stand helps).
5) Background + framing that looks “clean” in small rooms
A clean background isn’t about perfection. It’s about reducing visual noise so people focus on your face and voice.
Even in small rooms, you can create separation with a few simple moves.
- Create distance: sit 3–6 feet from the background when you can (depth makes video look cleaner).
- Pick one “quiet” wall: avoid a busy shelf directly behind your head.
- Frame: eyes in the upper third, shoulders visible, slight headroom (not too tight).
- Avoid bright objects behind you: lamps/windows in-frame can steal exposure and darken your face.
- Watch “head-antlers”: avoid vertical lines (lamp poles, door frames) lining up behind your head.
6) 10-minute setup checklist + troubleshooting
Use this when your call quality feels inconsistent day to day. The goal is repeatability.
If you can repeat a setup quickly, you stop “fighting” the camera and start focusing on the meeting.
- Raise camera: lens at eye level (books/stand/monitor arm).
- Move meeting window: put faces near the camera (top-center of screen).
- Kill backlight first: rotate desk or close blinds so the brightest light isn’t behind you.
- Place key light: side-front 30–45 degrees; soften it (shade/diffuser/bounce).
- Fix “tired eyes” look: lower the light source slightly and reduce overhead lighting.
- Move mic closer: before touching gain/noise suppression.
- Reduce typing noise: rotate mic away from keys; keep it off-axis and closer to your mouth.
- Record 10 seconds: check face exposure + glare + echo. Adjust position, not posture.
Face looks dark? Remove backlight and add side-front light.
Face looks grainy/noisy? Add more light (don’t push “brightness” sliders first).
Voice sounds echo-y? Move mic closer and lower gain before anything else.
You look like you’re not listening? Bring the meeting window near the camera.
Comparison table: drifting vs stable signals
| Signal | Setup is drifting | Setup is stable |
|---|---|---|
| Face lighting | dark face, bright background, harsh eye shadows | even exposure, soft shadows, no squinting |
| Eye-line | you look down or far off to the side | camera at eye level; meeting window near the lens |
| Audio | echo/room sound, you talk louder than normal | clear voice at calm volume; minimal keyboard noise |
| Posture | leaning forward to be heard/seen | neutral posture; you forget the setup and just talk |
Common mistakes (and quick fixes)
- Mistake: window behind you. Fix: rotate desk or close blinds; add side-front lamp.
- Mistake: laptop camera on desk. Fix: raise to eye level; keep the call window near the lens.
- Mistake: mic far away + gain high. Fix: move mic closer; lower gain; off-axis placement.
- Mistake: trying to “sit perfectly” to compensate. Fix: change angles so neutral posture looks good.
Mistake: bright background objects stealing exposure. Fix: remove bright lamps/windows from frame.
FAQ
Q1) Should I put my light directly above my monitor?
A) Usually no. Overhead light often creates eye-socket shadows. A softer side-front light (30–45 degrees) is a safer default.
Q2) Is a ring light okay for video meetings?
A) It can be. Keep it slightly off-center and not too high. If it’s too high, you’ll get harsh shadows and a flat look.
Q3) Why do I look like I’m not making eye contact?
A) Your eyes follow what you look at (faces on the screen). Move the meeting window close to the camera and use quick lens glances for key lines.
Q4) How close should my microphone be?
A) Close enough that you can speak softly—about a hand-span to forearm length. Move it closer before turning gain up.
Q5) My face looks blue on camera. What is that?
A) Often it’s monitor spill—your screen is acting like a blue light source. Lower screen brightness and rely on side-front lighting.
Q6) What’s the fastest way to reduce keyboard noise?
A) Don’t aim the mic at the keyboard. Place the mic off-axis and closer to your mouth. Distance is the biggest lever.
Internal Links
Best Webcams for Video Meetings: Lighting, Angle, and Real-World Setup (2025)
Best Microphones for Home Office Calls and Meetings (2025)
Home Office Lighting Setup: Best Lighting Practices to Reduce Eye Strain
Sources & References
- OSHA — Computer Workstations eTool: Workstation Environment (lighting/glare basics)
- NIOSH — Computer Workstation Checklist (PDF)
- HSE — Working safely with display screen equipment (DSE)
Professional Disclaimer
If you have persistent pain, numbness, tingling, dizziness, headaches that worsen, or symptoms that don’t improve, consult a qualified professional.
Update Log:
– 2026-01-21: Rebuilt the guide around the “3-angle stack,” added repeatable 5-minute baseline + 10-minute troubleshooting map, strengthened glare/monitor-spill fixes, refined comparison table and common mistakes.
I’m not a medical professional, ergonomist, or workplace specialist.WorkNest exists to help everyday people build more comfortable, practical home office environments through clear explanations, visual guides, and common-sense adjustments.
Articles on this site are written from a non-expert perspective, focusing on real-world use, everyday discomforts, and widely accepted setup principles rather than clinical or professional advice.