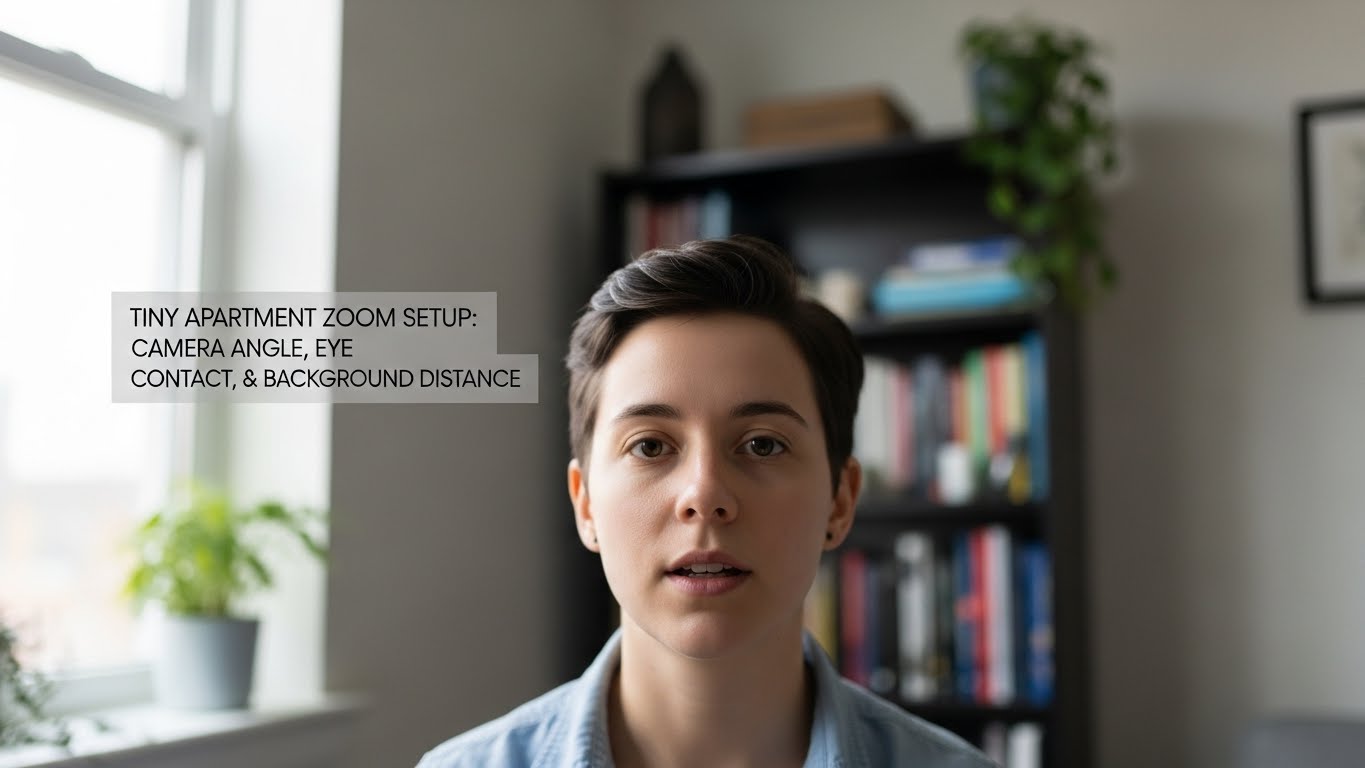
Tiny Apartment Zoom Setup: Camera Angle, Eye Contact, and Background Distance
How do I look “natural” on Zoom in a tiny apartment without a big background?
In a small space, you’re not fighting “messy room” as much as you’re fighting camera geometry.
The fastest fix is the Triangle of Presence:
(1) eye-level lens (or 2–5 cm above) with a slight downward tilt,
(2) 30–50 cm (12–20 in) face-to-lens to avoid wide-angle distortion,
and (3) 90–150 cm (3–5 ft) background separation (or fake it with framing + light).
If your calls feel exhausting, it’s usually because your setup forces a low camera “gargoyle” angle,
a flat wall behind your head, or a backlit silhouette.
- Fastest win: raise camera to eye level and tilt slightly down (books + stand = perfect)
- Eye contact trick: drag the active speaker window right under the webcam
- Depth trick: move your chair forward to create a gap behind you (don’t wrestle the whole desk)
- Lighting baseline: light from front/side-front, never behind you
- Fatigue hack: hide self-view after framing so you stop “checking yourself” all call
If you notice these patterns, your setup is the problem—not your willpower:
- The “Lizard Lean”: you keep leaning in to be seen or heard (camera too low / mic too far)
- The “Chin Tilt”: you constantly lift your chin to look better (lens too low)
- Eye burn + headaches: backlit window, harsh overhead light, or glare-heavy screen
- Self-monitoring fatigue: you keep watching your own tile like it’s a mirror
Fix height, distance, background gap, and light first. This article is informational only and does not replace professional ergonomic, vision, or medical advice.
If you have persistent eye pain, dizziness, worsening headaches, or neck/shoulder symptoms, consider professional evaluation.
Last Updated: 2026-01-17 |
Expert Review: WorkNest Ergonomic Lab |
Author: WorkNest Team
- Lens at eye level: raise the camera (or 2–5 cm above) and tilt slightly down.
- Arm’s-length distance: sit 30–50 cm (12–20 in) from the lens to stop “fish-eye face.”
- Create a gap: aim for 90–150 cm (3–5 ft) behind you; if you can’t, keep the background darker + simpler.
- Side-front light: place a lamp at 10 o’clock or 2 o’clock, slightly above eye height.
- Eye contact illusion: drag the meeting window under the webcam and hide self-view after framing.
I learned this the hard way: tiny apartments can make you look “off” on Zoom even when you’re well-prepared.
The camera angle turns into an up-the-nose shot, the wall behind you feels like a mugshot backdrop, and you start fixing yourself mid-meeting.
It’s subtle, but your body reacts—neck tension, dry eyes, that weird end-of-day drained feeling.
The twist is that you don’t need a bigger room or expensive gear.
You need better geometry.
Once the lens height, face distance, and background separation are right, you stop thinking about the camera—and you just talk like a normal human.
Table of Contents
- 1) Camera angle: eye level beats “laptop-on-desk” every time
- 2) Face distance: the distortion zone (and the fix)
- 3) Eye contact that feels natural (the “under-lens window” rule)
- 4) Background distance in a tiny room: how to fake depth
- 5) Lighting in small spaces: kill silhouettes and tired shadows
- 6) Audio layout: reduce echo without foam panels
- Comparison table: pro presence vs cramped-clutter frame
- FAQ: tiny apartment Zoom problems (solved)
- Internal Links
- Sources & References
- Professional Disclaimer
1) Camera angle: eye level beats “laptop-on-desk” every time
Laptop webcams are built for convenience, not for how humans read faces.
When the camera is low, you compensate without noticing: you lift your chin, you lean forward, you tighten your neck.
On the other end, it can look like you’re “looming” or distracted—even if you’re listening carefully.
Lens at eye level (or 2–5 cm above), with a slight downward tilt.
If your laptop is the camera, elevate the laptop—not your head.
- Best quick fix: stacked books + laptop stand. It looks silly off-camera. It looks amazing on-camera.
- Don’t cheat by raising your chair: you’ll end up with shoulders up and wrists awkward.
- Framing sweet spot: eyes in the top third of the frame, with a little headroom (not a floating forehead).

2) Face distance: the distortion zone (and the fix)
Tiny rooms push you closer to the screen. That’s where webcams get weird.
Most laptop and budget webcams use a wide field of view—great for capturing a room, bad for capturing a face up close.
When you sit too close, your nose and near-side cheek look larger, and your head shape feels “off.”
Under 30 cm (12 in) from lens: distortion rises fast.
Aim for 30–50 cm (12–20 in) for a more natural perspective and less “big nose” effect.
Here’s the part people miss: if you move farther away to avoid distortion, you often start leaning in to be heard.
That cancels the win. So treat distance as a system:
keep the lens at eye level, stay in the 30–50 cm range, and keep your mic “close enough” (we’ll fix audio later).
3) Eye contact that feels natural (the “under-lens window” rule)
Real eye contact on video calls is a trick.
If you look at someone’s eyes on your screen, you’re usually looking slightly away from the lens—so to them, you look distracted.
But staring into the lens the entire time makes you look intense and feels robotic.
Shrink your meeting window and place it at the top-center of your screen, directly under the webcam.
Now you can look at faces and still read as “eye contact.”
- Hide self-view: check framing once, then hide it. The fatigue drop is real.
- Use “near-lens,” not “perfect lens”: perfect eye contact can look unnatural on video.
- If you keep forgetting: a tiny sticky dot near the camera works as a gentle reminder.
When you’re listening, it’s okay to look at the face tile.
That rhythm reads as natural presence.
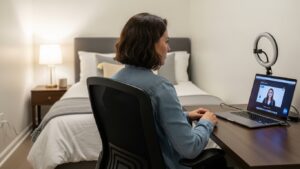
4) Background distance in a tiny room: how to fake depth
The #1 “small room” giveaway isn’t your furniture—it’s the flat wall right behind your head.
When there’s no separation, the frame feels cramped and tense.
Depth cues are what make a tiny corner look calm.
- Create separation first: aim for 90–150 cm (3–5 ft) behind you. If you only have 60 cm, keep the background simpler and slightly darker.
- Move yourself, not the desk: slide your chair forward. Keep the desk where it is if needed.
- Diagonal framing: angle your chair/desk 10–20°. It creates a longer “vanishing line,” so the room looks deeper.
- Use one anchor object: a lamp or plant off to one side. One calm object adds depth. Five objects add chaos.
People try to “show the whole room” to look tidy—then accidentally reveal clutter, laundry racks, doors, and bright windows.
In tiny apartments, a tighter frame usually looks more professional.
5) Lighting in small spaces: kill silhouettes and tired shadows
Lighting is the difference between “I look professional” and “I look exhausted.”
Cameras expose for the brightest thing in the frame.
If your window is behind you, your face becomes a silhouette. If your only light is overhead, you get deep eye shadows.
- Best default: place a lamp side-front (about 45°) and slightly above eye level.
- Window rule: window to the side, not behind. Rotate 90° if you can.
- Diffuse harsh light: sheer curtain, white lampshade, or bouncing light off a white wall.
- Consistency beats brightness: unstable sunlight shifts = unstable exposure = you look “flickery.”
Turn on camera preview: if your background is brighter than your face, you’re backlit.
Fix it by rotating to the window or adding a side-front lamp as face fill.
If you wear glasses, avoid putting a ring light dead-center in front of you.
Move it slightly to the side so you don’t get two glowing circles reflected in your lenses.
6) Audio layout: reduce echo without foam panels
Small apartments are “acoustically bright.” Hard floors, bare walls, and tight corners create reflections,
which makes your voice sound thin or echo-y (bathroom vibes).
You don’t need studio foam. You need softer surfaces and closer mic placement.
- Get the mic closer: closer mic lets you lower input gain, which reduces room noise and echo pickup.
- Soften one big surface: rug under desk, curtain on window, or a throw blanket on a nearby hard wall.
- Keyboard control: keep the keyboard slightly farther from the mic than your mouth is.
- Fan placement: place fans to the side and blow air across you, not into the mic.

Comparison table: pro presence vs “cramped closet” frame
| Feature | Distracting / tiring | Stable / natural |
|---|---|---|
| Camera height | low laptop angle, chin-up posture | eye level (or slightly above), slight down tilt |
| Face distance | too close, wide-angle distortion | 30–50 cm (12–20 in), natural proportions |
| Eye contact | eyes dart, self-view checking | meeting window under lens, calmer gaze |
| Background | busy, bright, too close | simple, slightly darker, with separation |
| Lighting | backlit window, overhead-only shadows | side-front lamp, stable exposure |
| After-call feel | neck tension, fidgeting, fatigue | you forget the camera and just talk |
FAQ: Common tiny-apartment Zoom struggles answered
Q1) My room is so small I can’t move my desk. What do I do?
A) Don’t move the desk—move your call station. For meetings, use a counter or a small side table, elevate the laptop, then return to your normal desk for deep work.
Frame tighter so less of the apartment is visible.
Q2) Should I use a virtual background?
A) Only as a last resort. Virtual backgrounds can glitch around hair/ears and look more distracting than a simple real background.
If you must use one, increase side-front lighting so the software separates you cleanly.
Q3) Where should I look for eye contact—camera or faces?
A) Aim “near lens.” Put the active speaker window right under the webcam so you can look at faces while still reading as eye contact.
Staring into the lens nonstop looks unnatural and feels stressful.
Q4) My background is always messy. What’s the simplest fix without buying furniture?
A) Move yourself forward, frame tighter, and keep the background darker and simpler.
One calm corner with one lamp/plant beats a whole room in the shot.
Q5) Why do I look yellow or green on camera?
A) It’s usually mixed lighting. Warm bulbs + cool window light confuses white balance.
Try using one dominant light source (ideally side-front), or match bulbs to a similar color temperature for consistency.
Internal Links
Webcam Buyer’s Guide: 2026 High-End Clarity for Home Offices
Clear Audio Secrets: How to Sound Like a Pro in a Small Room
The 3-Layer Lighting Rule: Never Look Tired on Video Calls Again
Sources & References
- OSHA — Computer Workstations eTool: Monitors
- NIOSH — Computer Workstation Checklist (PDF)
- NIH (PubMed) — Videoconference Fatigue: Conceptual Analysis
Professional Disclaimer
Living spaces and individual needs vary. If you experience persistent headaches, eye pain, dizziness, or worsening neck/shoulder symptoms, consider consulting a qualified professional.
Update Log:
– 2026-01-17: Consolidated the “Triangle of Presence” system (lens height, face distance, background separation), strengthened the under-lens eye contact method, and added small-apartment lighting + echo control protocol.
I’m not a medical professional, ergonomist, or workplace specialist.WorkNest exists to help everyday people build more comfortable, practical home office environments through clear explanations, visual guides, and common-sense adjustments.
Articles on this site are written from a non-expert perspective, focusing on real-world use, everyday discomforts, and widely accepted setup principles rather than clinical or professional advice.