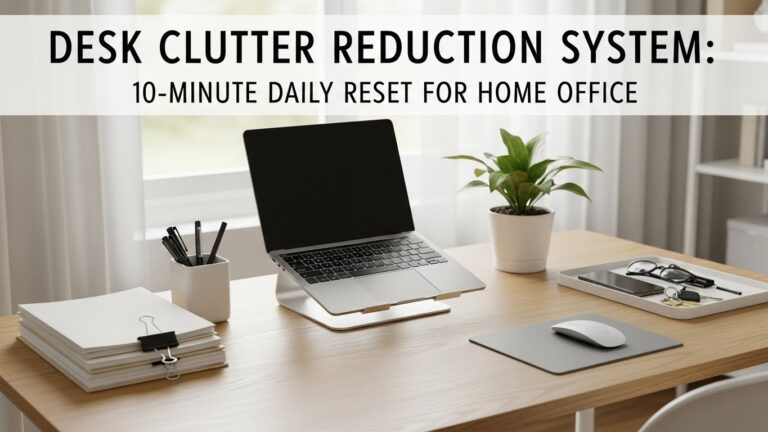
Desk Against a Window Setup: Reflection, Backlight, and Best Placement Rules
Can I put my desk against a window without glare and “backlit video call” problems? (ISO 9241-303 aligned)
Yes — but only if you treat the window like a light source you control, not “free decor.”
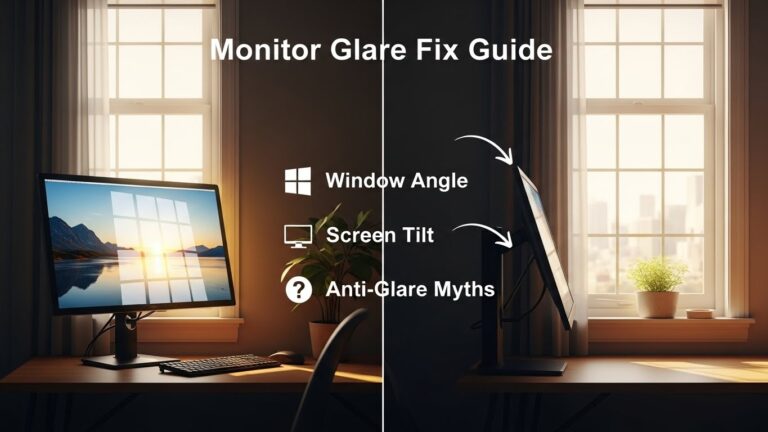
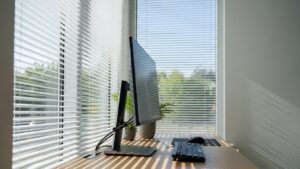
The most stable baseline is side-light placement: keep your monitor perpendicular to the window (window at your 3 o’clock or 9 o’clock).
Then use diffusion (sheers / blinds) to calm the brightness swing, and add a small front-fill light for calls so you don’t turn into a silhouette.
Most “my eyes feel cooked” setups come from one of three patterns: reflection glare, veiling glare (washed-out contrast), or camera backlight.
- Best default: window to your left or right (not directly in front, not directly behind)
- Fastest no-cost win: fix angles first (desk + monitor), then fix window intensity
- Rule that prevents eye fatigue: keep brightness in a comfortable ratio (screen ↔ desk ↔ background), not “screen vs sun”
- Video call fix: add a soft front-fill so the camera stops exposing for the bright window
- Eyes: burning, dryness, headaches that ramp up across the day
- Neck/shoulders: you keep leaning or tilting to “escape” reflections
- Afternoons worse: the sun angle shifts and your “perfect” setup collapses
- Calls look bad: your face is dark, background is bright, camera looks grainy/noisy
If you have persistent headaches, sudden vision changes, or pain that doesn’t improve with setup changes, consider professional evaluation.
This guide is informational and not medical advice.
Last Updated: 2026-01-11 |
Expert Review: WorkNest Ergonomic Lab (Visual Ergonomics Div.) |
Author: WorkNest Team
- Rotate first: aim for window to the side (desk perpendicular to the window).
- Mirror Test: confirm what your screen can “see” (Section 2). If the screen sees the window, glare will come back.
- Micro-tilt down: start nearly vertical, then tilt 5–10° downward until reflections stop following head movement.
- Diffuse the window: sheers or angled blinds to reduce hotspots (don’t “fight” the sun with monitor settings).
- Fix calls: add a soft front-fill light near the webcam side so your face isn’t underexposed.
If you’ve ever tried to work by a window, you know the story: it looks amazing for 20 minutes… and then the sun moves.
Suddenly you’re squinting, the screen looks washed out, and on video calls you look like you’re in a witness protection program.
The frustrating part is that people usually blame the monitor — when it’s mostly angles + brightness ratios.
We built this guide for real rooms (and real posture shifts). The goal isn’t “one perfect angle.”
The goal is a setup that stays comfortable when you lean in, sit back, stand up, and hit a call without rearranging your life.
Table of Contents
- 1) The 3 window problems: reflection, veiling glare, and backlight
- 2) Reflection control: the Mirror Test (fast + accurate)
- 3) Contrast control: diffusion + the “1:3:10” comfort ratio
- 4) Best placement rules: side light, monitor tilt, blinds, and bias light
- 5) Video call backlight: camera-friendly lighting that still feels natural
- 6) Scenario matrix: if your layout is fixed, do this
- 7) Comparison table: drifting setup signals vs stable signals
- FAQ
- Internal Links
- Sources & References
- Professional Disclaimer
1) The 3 window problems: reflection, veiling glare, and backlight
“Window glare” is not one problem. It’s three different failures that look similar at first.
If you mix them up, you end up buying random stuff and still feeling wrecked by mid-afternoon.
-
Reflection glare (mirror glare):
you see a bright shape on the screen (window/sky/lamp). It often moves when you move.
This is mostly an angle problem. -
Veiling glare (washed contrast):
text looks gray and “soft,” even without a crisp reflection patch.
This is usually a brightness ratio problem (bright window + dark room, or harsh overheads). -
Backlight on video calls:
window behind you makes your face dark because the camera exposes for the bright background.
This is a camera exposure + lighting problem.
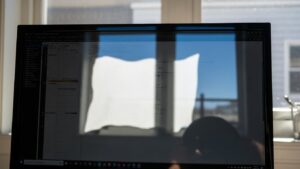
2) Reflection control: the Mirror Test (fast + accurate)
Here’s the trap: you “fix” glare in one seated position — then it comes back the moment you shift posture.
That’s because reflections are geometry, not vibes. So we use a test that stops the guessing.
2) Sit in your normal posture (including your “fatigue slouch”).
3) Tilt the mirror slightly. If you can see the window/bright sky in the mirror, your screen can “see” it too — reflections will return.
4) Fix order: (1) rotate desk/monitor a few degrees → (2) micro-tilt down → (3) angle blinds / add sheers → (4) anti-glare last.
Two small details that matter more than people expect:
- Start near vertical: a reclined screen “catches” ceiling/window reflections like a shallow bowl.
- Micro-tilt beats macro changes: often 5–10° downward is the difference between “glare follows me” and “glare stays gone.”
3) Contrast control: diffusion + the “1:3:10” comfort ratio
If your screen looks washed out even without a sharp reflection, you’re dealing with veiling glare.
In plain terms: the room is too bright (or too extreme) compared to the screen, so contrast collapses.
screen → desk area → background.
When the background (window/sky) is wildly brighter, your eyes keep re-adapting — that’s where fatigue lives.
Practical ways to flatten that “brightness cliff” without buying a new monitor:
- Diffuse first: sheer curtains are the quickest fix because they reduce hotspots without turning the room into a cave.
- Blinds angle matters: if you have horizontal blinds, angle slats upward so light bounces to the ceiling instead of blasting your screen.
- Don’t win with brightness alone: cranking monitor brightness to overpower a bright window often makes you tense up and blink less.
4) Best placement rules: side light, monitor tilt, blinds, and bias light
If we could give you one “default that works in most apartments,” it’s this:
side light + diffusion + micro-tilt.
-
Side light baseline: place the monitor so the window is at your 3 o’clock or 9 o’clock.
This reduces both mirror reflections and extreme front/back contrast. - Micro-tilt downward: start vertical, then tilt 5–10° down so reflections “fall” toward your chest/lap instead of your eyes.
-
Diffuse the hottest part of the window: sheers or blinds angled upward to push light to the ceiling.
(A white ceiling is basically a giant free softbox.) - Bias light behind the monitor: if the wall behind your monitor is dark, a soft backlight helps your eyes by reducing the screen-to-wall contrast.
Fix the window intensity and screen geometry first — then adjust settings.
5) Video call backlight: camera-friendly lighting that still feels natural
If the window is behind you, most webcams will expose for the bright background.
Your face becomes a dark blob, the camera adds gain, and the image turns noisy — which somehow makes you feel more tired on calls.
- Best placement for calls: window at a side-front angle (slightly to the side and a bit in front of you).
- If the window must be behind you: add a soft front-fill near the webcam side (lamp or small light).
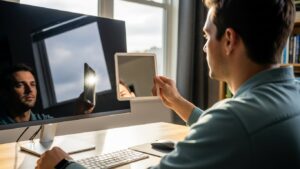
- Quick check: if your preview improves when you block the window with your hand, you’re backlit.
- If your webcam software allows: lock exposure on your face. It’s better for the window to go bright than for your face to be dark.
You’ll look more even on calls, and your eyes won’t spend the whole day adapting to extreme background brightness.
6) Scenario matrix: if your layout is fixed, do this
Sometimes you can’t move the desk. Fine. But you need the right compensation move for the actual failure mode.
| Scenario | What usually goes wrong | Best compensation sequence |
|---|---|---|
| Desk facing window | contrast washout + veiling glare | sheer curtain → blinds angled upward → bias light behind monitor → micro-tilt down |
| Back to window | screen reflections + backlit webcam | diffuse window → rotate monitor slightly off-axis → micro-tilt down → add soft front-fill for calls |
| Window on one side (too bright) | one-sided eye fatigue + hotspots | diffuse side window → keep monitor centered → add ambient/bias light on the darker side |
7) Comparison table: drifting setup signals vs stable signals
| Signal | Setup is drifting | Setup is stable |
|---|---|---|
| Head movement | you keep “hunting” for a glare-free angle | you forget glare exists |
| Eyes | burning/dry feeling, squinting ramps up | neutral gaze, less end-of-day fatigue |
| Text clarity | washed contrast, “soft” letters | consistent contrast across posture shifts |
| Video calls | face dark, background bright, noisy image | even face lighting, cleaner webcam image |
FAQ
Q1) Should I use a matte or glossy monitor for a window setup?
A) Matte screens can reduce mirror-like reflections, but very bright windows can still cause washout. Glossy screens look crisp but reflect more.
In practice, placement + diffusion matters more than finish. Fix the room first, then decide.
Q2) Is Dark Mode better near a window?
A) Often no. Dark backgrounds can make reflections more obvious (like a black mirror). In bright rooms, lighter backgrounds can feel calmer because contrast is less extreme.
Q3) Why does glare come back later even after I “fixed it”?
A) Sun angle changes. A fix that works at 10 AM can fail at 3 PM. That’s why diffusion (sheers/blinds) plus the Mirror Test is the reliable combo.
Q4) Does anti-glare film solve desk-against-window issues?
A) It can help, but it’s not step one. If angles and brightness ratios are wrong, film often becomes a “bandage.” Do geometry and diffusion first.
Q5) What’s the fastest way to look better on calls near a window?
A) Put the window at a side-front angle and add a small soft front-fill near the webcam side. Don’t rely on virtual backgrounds to fix lighting.
Internal Links
Desk Placement Guide: Window, Light Direction, and Reflection (2025)
Screen Glare in Small Rooms: 7 Ways to Prevent Reflection and Eye Strain
Home Office Lighting Setup: Best Lighting Practices to Reduce Eye Strain
Sources & References
- OSHA — Computer Workstations eTool: Monitor placement and glare
- NIOSH (CDC) — Ergonomics and workstation basics
- NIH (PMC) — Digital eye strain review (lighting, glare, and workstation factors)
Professional Disclaimer
If you have persistent headaches, eye pain, worsening vision symptoms, or ongoing neck/shoulder pain, consult a qualified professional.
Update Log:
– 2026-01-11: Merged best elements into a single “window-safe” system: 3-problem diagnosis, Mirror Test, side-light placement rules, diffusion + contrast ladder, and video-call backlight protocol.

I’m not a medical professional, ergonomist, or workplace specialist.WorkNest exists to help everyday people build more comfortable, practical home office environments through clear explanations, visual guides, and common-sense adjustments.
Articles on this site are written from a non-expert perspective, focusing on real-world use, everyday discomforts, and widely accepted setup principles rather than clinical or professional advice.