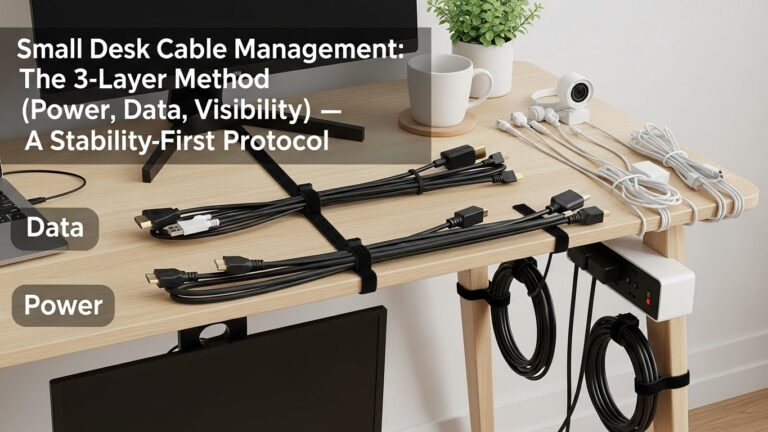
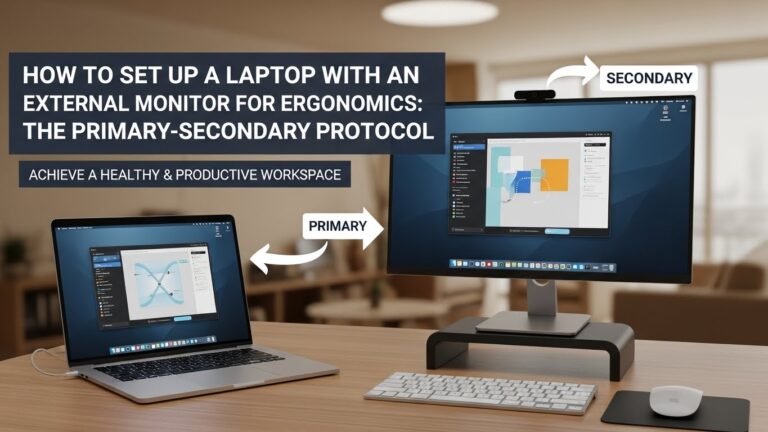
Small Desk Cable Management: The 3-Layer Method (Power, Data, Visibility)
What’s the fastest way to clean up cables on a small desk—without making your setup harder to use?
Use the 3-layer method: lock down Power first (one safe “hub” under the desk), then route Data (monitor/USB/audio/Ethernet) with slack where you actually move, and finally control Visibility (only the one cable you truly need in sight).
The goal is not “zero cables.” It’s predictable cable paths that never snag when you shift posture, roll your chair, or plug/unplug once.
- Layer 1 (Power): one under-desk power hub + one exit path to the wall (no “spider legs”)
- Layer 2 (Data): group by destination + add a gentle service loop where movement happens
- Layer 3 (Visibility): hide bulk, keep one daily-use cable accessible in 10 seconds
- Done definition: no tugging, no ankle snags, and you can service one device in <30 seconds
- Warm/hot power strip, melting smell, or power bricks packed with no breathing room
- Power cords pinched under chair wheels, or sharply bent where they meet the wall outlet
- Daisy-chaining power strips, or running one strip near its limit for hours
- Cords crossing walk paths (ankle snag = real injury risk)
If you notice heat, damaged insulation, shocks, or repeated breaker trips, stop and fix the electrical layout first.
This guide is informational and not a substitute for professional electrical or safety advice.
Last Updated: 2026-01-13 |
Expert Review: WorkNest Ergonomic Lab |
Author: WorkNest Team
- Unplug once: separate what must stay powered (monitor/laptop/dock/router) from “sometimes” devices.
- Pick one power hub: mount the power strip under the desk (rear-center is the safest default for most setups).
- One exit path: route only ONE main cord to the wall—pin it to a desk leg or wall edge.
- Group data lines: monitor/video together; USB/peripherals together; keep a small slack loop where movement happens.
- Visibility rule: only one daily-use cable is allowed on the desktop (usually your phone charger).
- 60-second snag test: roll the chair, move feet, adjust posture, plug/unplug once. If anything tugs, reroute before you “tidy.”
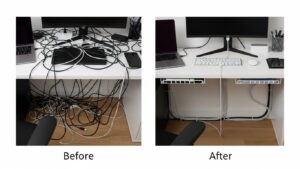
On a small desk, cable mess doesn’t stay “in the background.” You feel it constantly: the mouse cable drags, your charger falls behind the desk,
and your foot catches a loop you didn’t know existed. The annoying part is the desk looks fine… until you actually work for two hours.
Cable cleanup can also backfire. If you lock everything down too tightly, you create tug points. If you hide everything permanently, you hate maintenance.
The 3-layer method is built for real life: typing, calls, charging, quick device swaps—without turning cable management into a hobby.
Table of Contents
- 1) Why small desks get messy faster (and why “random hiding” fails)
- 2) The 3-layer method explained: Power → Data → Visibility
- 3) Layer 1: Power (the safe hub + one exit path)
- 4) Layer 2: Data (service loops, routing, and interference)
- 5) Layer 3: Visibility (what stays accessible vs what disappears)
- 6) Common constraints: one outlet, standing desk movement, shared rooms
- 7) Comparison: baskets vs raceways vs sleeves vs clips
- FAQ
- Internal Links
- Sources & References
- Professional Disclaimer
1) Why small desks get messy faster (and why “random hiding” fails)
Small desks don’t forgive clutter because cables don’t just look messy—they steal movement.
A loop steals legroom, a power brick steals your reach zone, and a loose bundle becomes a snag point every time you shift posture.
That’s why “shove everything behind the desk” usually collapses fast: dust builds up, adapters get warm, and the first device change turns into a full teardown.
The winning idea is predictability:
your cables should follow the same path every day, and maintenance should take seconds—not an hour.
That’s exactly what the 3-layer method does.
2) The 3-layer method explained: Power → Data → Visibility
Think of cable management like a simple building: power is the foundation, data is the wiring, and visibility is the “front of house.”
If you try to make it pretty before power is stable, it falls apart.
- Power: where electricity lives (power strip, adapters, one route to the wall).
- Data: cables that connect things (monitor/video, USB hubs, audio, Ethernet).
- Visibility: what your eyes and hands interact with daily (charger, headset cable, maybe one USB-C).
Before you tighten anything, do a real work simulation: roll the chair, move legs, pull the keyboard slightly, plug/unplug once.
If something tugs, your routing is wrong—no organizer will fix that.
3) Layer 1: Power (the safe hub + one exit path)
The fastest win for a small desk is creating a single power hub under the desk.
This prevents the “spider-leg” effect where every device runs to the wall separately, and it keeps cords off walk paths.
- Choose a hub location: under-desk rear center is a strong default (easy access, out of the knee zone).
- Mount it (don’t drop it): mounting prevents bricks from dragging and pulling cables loose.
- One exit path: route one main cord to the outlet and keep it pinned to a desk leg or wall edge.
- Heat reality: don’t coil power cords tightly; give adapters breathing room. If anything feels warm, redesign the hub.
- Service rule: you should be able to unplug one device without disassembling everything.
and if you have multiple high-draw devices (heaters, kettles, large printers), they should not live on the desk strip.

It looks clean—until adapters get warm and you start unplugging things because “something feels off.”
Hide bulk, yes, but keep breathing room and easy service access.
4) Layer 2: Data (service loops, routing, and interference)
Data cables are the ones that silently break a clean setup because they need movement slack.
Monitors tilt, laptop lids move, chairs roll. If you tie data cables too tight, you create tug points that feel like “random glitches” later.
- Create a gentle service loop: leave a small slack loop behind the monitor/stand so adjustments don’t strain ports.
- Route by destination: monitor/video together, USB/peripherals together, audio separate if you can (less tangling).
- Anchor points matter: use 2–3 anchor points (rear edge → leg → hub), not 12 tiny clips everywhere.
- Keep connectors reachable: hide the cable length, not the ports you actually use.
- Interference sanity: if you can, keep data bundles and power bundles separated instead of taping them into one fat rope.
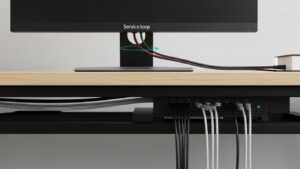
It’s where motion happens: monitor arm, laptop stand hinge, docking cable, standing desk travel.
Give slack there, then keep the rest routed cleanly to the hub.
5) Layer 3: Visibility (what stays accessible vs what disappears)
Visibility is where tiny desks win. You don’t need a perfect hidden build—you need a desk that feels calm.
The simplest rule: allow one visible cable that you touch daily (usually a phone charger), and hide the rest.
- Choose your “one visible cable”: the one you unplug daily should be easy to reach, not buried.
- Hide bulk below: bricks, adapters, and excess length live under the desk, not at the back corner.
- Make it reversible: you should be able to add/remove one device without destroying the whole layout.
- Weekly 8-minute reset: put loose ends back into their path and wipe the surface (small desks show dust fast).
6) Common constraints: one outlet, standing desk movement, shared rooms
Real apartments rarely have perfect outlets. Here’s how the 3-layer method adapts without turning into chaos:
- One outlet only: keep the strip under the desk + route the single exit cord along a wall edge (never across a walk path).
- Standing desk: you need a longer service loop for height movement and you must keep cords away from pinch points.
- Shared room: prioritize Visibility—your desk should look “closed” when you’re done (one visible cable max).
7) Comparison: baskets vs raceways vs sleeves vs clips
| Tool | Best for | Where it fails |
|---|---|---|
| Under-desk basket | Power hub + bricks + bulk hiding | If overloaded, becomes a warm tangled nest that’s hard to service |
| Raceway (channel) | Clean routing along desk edge/leg | Painful if you swap gear often (hard to “service fast”) |
| Mesh sleeve | Standing desk “spine” bundle + flexible movement routing | Can hide problems if you don’t keep a service loop at the endpoints |
| Adhesive clips | Guiding one or two cables (especially the one visible cable) | Too many clips = messy, annoying, and fragile over time |
That’s enough for most small desks without creating a maintenance hobby.
FAQ
Q1) Should I zip-tie everything tight to make it look clean?
A) Usually no. Tight ties create tug points. Use gentle slack loops where movement happens (monitor, laptop, standing desk travel) and anchor the route instead.
Q2) Is it okay to coil extra cable length under the desk?
A) Avoid tight coils—especially with power cords. Keep extra length loosely routed and give adapters breathing room. If anything feels warm, redesign the power hub.
Q3) What’s the best place to mount the power strip on a small desk?
A) Rear center under the desk is a strong default: out of leg space, easy access, and it shortens most cable runs.
Q4) My monitor cable “randomly disconnects.” Is that cable quality or routing?
A) Often routing. If the cable is tied too tight, small movements strain the port. Add a service loop behind the monitor/arm and anchor the route on the way down to the hub.
Q5) I change devices a lot (laptop, tablet, camera, mic). How do I keep it clean?
A) Keep Layer 3 (Visibility) flexible: allow one accessible charging spot and avoid sealing everything into raceways. A clean setup that you hate to service won’t last.
Q6) How do I know my setup is actually “done”?
A) Do the snag test: roll chair, move feet, adjust posture, plug/unplug once. If nothing tugs and you can service one device in under 30 seconds, you’re done.
Internal Links
Cable Management for Small Desks: Clean Home Office Setup Blueprint
Surge Protector Power Strip Desk Setup: Safe Picks and Layout Rules
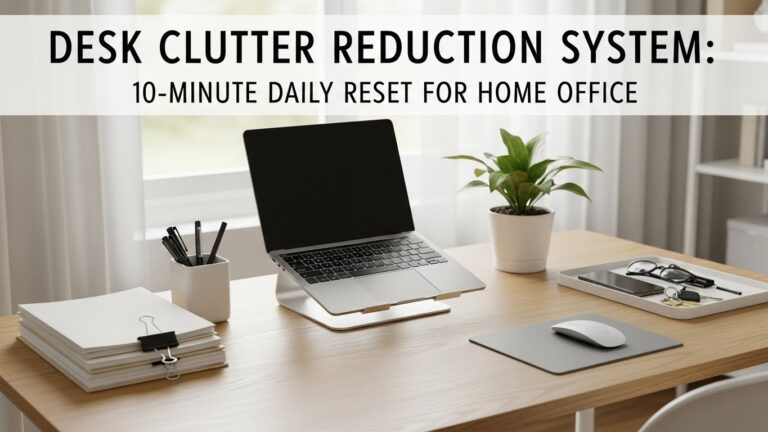
Desk Clutter Reduction System: 10-Minute Daily Reset
Sources & References
- OSHA: Electrical Safety (hazard recognition)
- HSE: Electricity at work (safe practices)
- NIOSH: Computer Workstation Checklist (PDF)
- UL (safety standards and certification overview)
Professional Disclaimer
If you notice heat, damaged cords, shocks, repeated breaker trips, or unsafe wiring, stop and consult a qualified professional.
Update Log:
– 2026-01-13: Merged two drafts into a single “3-layer” system with a stricter 10-minute reset, clearer snag-test definition of “done,”
and stronger guidance on service loops + power hub airflow + fast maintenance.

I’m not a medical professional, ergonomist, or workplace specialist.WorkNest exists to help everyday people build more comfortable, practical home office environments through clear explanations, visual guides, and common-sense adjustments.
Articles on this site are written from a non-expert perspective, focusing on real-world use, everyday discomforts, and widely accepted setup principles rather than clinical or professional advice.