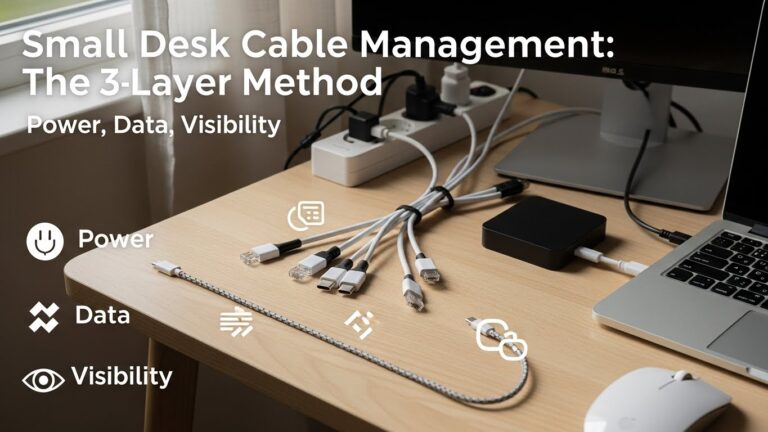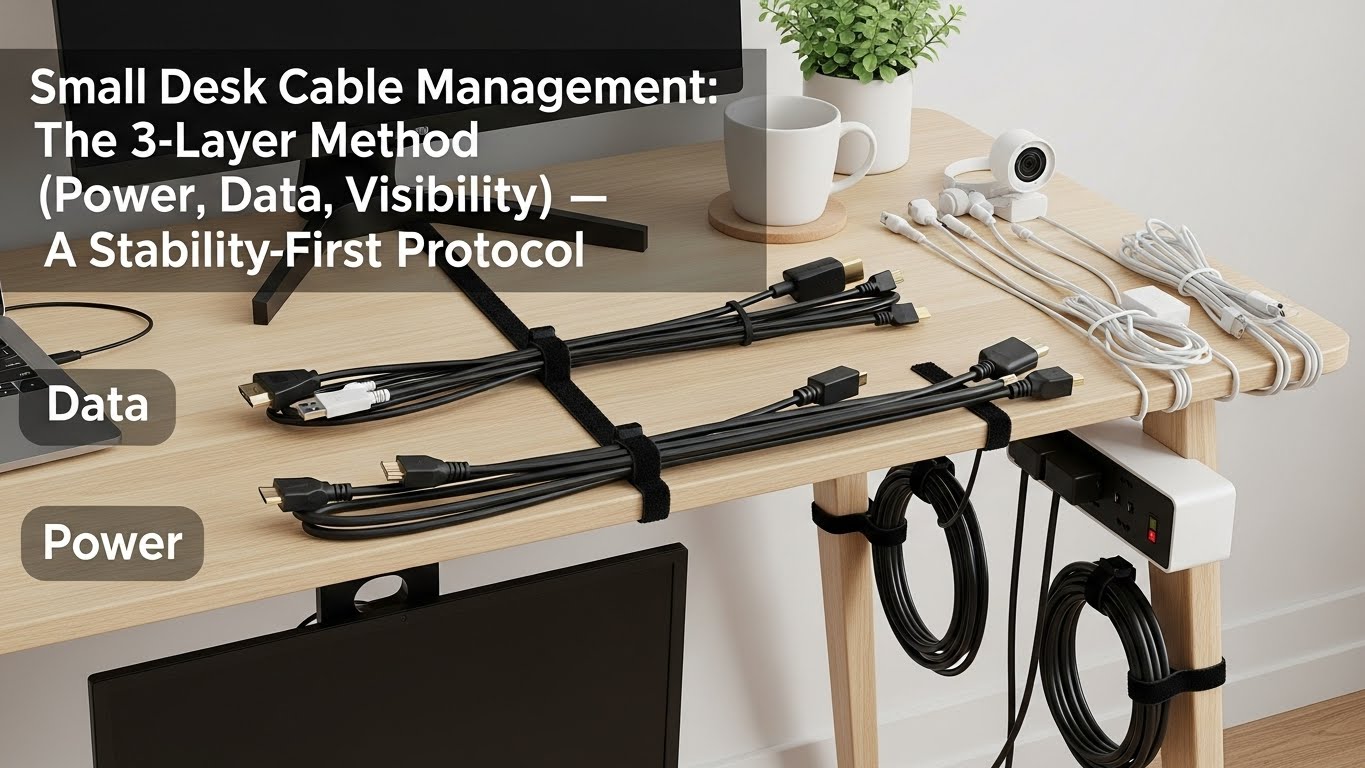
Small Desk Cable Management: The 3-Layer Method (Power, Data, Visibility) — A Stability-First Protocol
What’s the cleanest way to manage cables on a small desk without redoing everything?
Don’t “organize cables.” Separate jobs.
Small desks stay clean when you treat cables as three different systems:
(1) Power = fixed & safe, (2) Data = short & serviceable, (3) Visibility = remove visual noise.
Most setups fail because they zip-tie everything the same way—so the first device swap breaks the whole bundle.
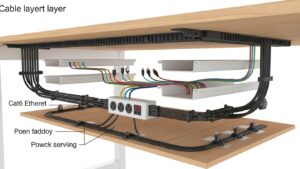
- Layer 1 (Power): one under-desk “power zone” + strain relief + heat spacing
- Layer 2 (Data): one underside “spine” + small service loops where movement happens
- Layer 3 (Visibility): hide only the 2 cables your eyes keep catching (front edge + leg zone)
- Fast win: fix the cable that touches chair wheels/feet first (tug risk disappears instantly)
- Loose cords near chair wheels (sudden pull = port damage, device drops)
- Warm power bricks pressed together or touching fabric/rugs (heat can build up)
- Daisy-chained power strips or overloaded outlets
- Cables stretched tight (no strain relief) — one tug away from failure
This guide is informational only. If you’re unsure about electrical safety, outlet load, or damaged cords, consult a qualified professional.
Last Updated: 2026-01-07 |
Expert Review: WorkNest Ergonomic Lab |
Author: WorkNest Team
10-Minute Deployment Sequence: “Zone → Anchor → Spine → Two Exits → Two Cables”
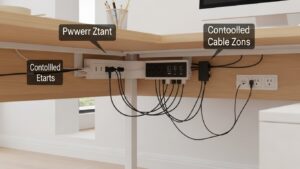
- Zone: choose one under-desk back corner as your power zone (away from feet + wheels).
- Anchor: mount one container (basket/raceway) to hold strip + bricks off the floor.
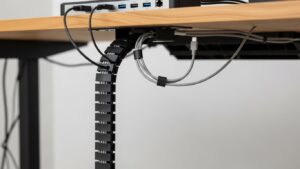
- Spine: route data cables along one underside edge (not across the middle).
- Two exits: one path up to the desktop, one path toward the wall/outlet. Keep it boring.
- Two cables: hide only (A) the front-edge cable and (B) the leg-zone cable. Stop there.
Small desks have an unfair problem: the surface is tiny, but the cable count is basically the same as a big setup.
Monitor power, laptop power, dock, USB hub, HDMI/DP, chargers… and suddenly the “spaghetti” hangs where your eyes and legs live.
The fix isn’t buying a pile of clips. It’s deciding what should be fixed forever, what needs service access,
and what only needs to disappear from your visual field. That’s the 3-Layer Method.
Table of Contents
- 1) The 3-Layer Method (Power, Data, Visibility): why it works on small desks
- 2) Routing Priority Matrix: cable function → routing decision
- 3) Layer 1: Power zone engineering (safe, fixed, and boring on purpose)
- 4) Layer 2: Data spine + service loops (clean now, swappable later)
- 5) Layer 3: Visual noise elimination (the “2-cable rule”)
- 6) Small-desk routing patterns that survive real life
- 7) Tool selection: basket vs raceway vs clips (and when each fails)
- 8) Stability check: clean setup vs “looks clean but breaks later”
- FAQ
- Internal Links
- Sources & References
- Professional Disclaimer
1) The 3-Layer Method (Power, Data, Visibility): why it works on small desks
Cable management gets messy when you treat every wire as the same problem.
But cables have different jobs—so they need different rules.
If you apply one rule (like “tight zip-ties everywhere”), you get a desk that looks clean today and turns into a nightmare the next time you move anything.
- Power layer: power strip, adapters, bricks, charger blocks (fixed under desk, low tug risk, heat-aware spacing).
- Data layer: HDMI/DP, USB, Ethernet, audio (short and tidy, but serviceable when you swap devices).
- Visibility layer: the few cables your eyes keep “catching” (front edge + leg zone).
2) Routing Priority Matrix: cable function → routing decision
This is the decision layer that stops you from over-doing it.
When you’re unsure what to do with a cable, classify it once—then the routing becomes obvious.
| Cable Type | Job | Routing Priority | Stability Rule |
|---|---|---|---|
| Power strip + bricks | Safety + reliability | Contain & immobilize | One power zone, off the floor, strain relief |
| USB/HDMI/DP/Ethernet | Performance + swaps | Short & serviceable | One spine + small service loops near movement |
| Front-edge chargers | Convenience | Visual noise control | Hide only what your eyes catch repeatedly |
A “perfectly hidden” setup that takes 20 minutes to swap one cable is not cable management. It’s future stress.
3) Layer 1: Power zone engineering (safe, fixed, and boring on purpose)
A small desk turns chaotic when power bricks float mid-air, sit on the floor, or end up where knees and chair wheels can hit them.
Your goal is one power zone that doesn’t move.
- Place it in the back third: if your feet can touch it, it’s in the wrong spot.
- Contain it: use an under-desk basket or a raceway to hold the strip + bricks off the floor.
- Give heat room: don’t press warm bricks tightly together; avoid fabric contact when possible.
- Strain relief: leave a small slack loop before each device port (so one tug doesn’t rip a connector).
- One wall run: power exits the desk in one controlled path (no multiple floor snakes).
4) Layer 2: Data spine + service loops (clean now, swappable later)
This is where people over-commit.
They bundle everything tight, then hate their life when they swap a monitor, add a webcam, move a dock, or rotate a laptop stand.
The goal is short + serviceable, not “vacuum-sealed.”
- One data spine: route data cables along one underside edge, then branch upward using 2–3 controlled exits.
- Short runs: extra length becomes visual noise and leg-zone drift.
- Service loops: keep a small slack loop where movement happens (monitor arm, laptop stand, docking area).
- Access > perfection: you should be able to unplug one cable without disassembling the whole desk.
5) Layer 3: Visual noise elimination (the “2-cable rule”)
You don’t need to hide every cable to feel organized.
You only need to remove cables from your primary visual lanes—places your eyes see repeatedly without trying.
(1) the front-edge cable (phone/headset/charger) and
(2) the leg-zone cable (the one that hangs into where your feet/chair live).
Fix those first—then reassess before doing anything else.
6) Small-desk routing patterns that survive real life
Your setup should survive: chair movement, cleaning days, device swaps, pulling your laptop away for a meeting.
The patterns below look boring—because boring is stable.
- Back-edge spine: one route along the back underside edge; cables drop only at back corners.
- Two exit points max: one exit up to the desktop, one exit down to the wall/outlet.
- Leg-zone clearance: keep the center under the desk mostly empty (chair wheels and feet are chaos generators).
- Label only the critical ones: monitor power, dock power, router/Ethernet. Don’t label 17 cables—nobody keeps that up.
7) Tool selection: basket vs raceway vs clips (and when each fails)
Tools fail when you ask one tool to do all three layers.
Pick tools based on the layer you’re fixing—not based on what looks coolest in photos.
| Tool | Best for | Common failure | Fix |
|---|---|---|---|
| Under-desk basket | Power layer (strip + bricks) | Overstuffing → heat + messy access | Limit to essentials; leave breathing space |
| Raceway / channel | Data spine + clean wall run | Too tight → swaps become painful | Leave service access; don’t “seal” the route |
| Clips / ties | Visibility layer (front edge, leg zone) | Too many clips → clutter + time sink | Use only where eyes/feet repeatedly notice |
8) Stability check: clean setup vs “looks clean but breaks later”
This section is your reality gate. If a setup fails these checks, it will slowly drift back into cable chaos.
| Signal | Looks clean today, fails later | Stays clean in real life |
|---|---|---|
| Device swaps | swapping one device breaks the whole bundle | service loops + accessible routes |
| Leg space | cables drift into chair wheel zone | center under-desk stays clear |
| Power bricks | floating / hanging / piled on floor | one fixed power zone under desk |
| Visual calm | front-edge chargers still snake across the desk | front edge + leg-zone cable removed from view |
| Strain relief | ports feel “tight” and cables tug when you move | small slack loop before device ports |
- Roll your chair in and out twice (wheels + feet test).
- Pull your laptop/dock slightly forward, then push it back (movement test).
- Unplug one USB cable and re-plug it (service test).
- If any cable snags, tugs, or becomes visible noise again—adjust the zone/spine/exits, not random clips.
FAQ
Q1) Should I zip-tie everything as tight as possible?
A) Not for data cables. Tight bundles look clean until you swap one device. Use a data spine plus small service loops near moving parts.
Q2) Is it okay to keep power bricks in a basket?
A) Often yes—if you don’t overstuff it. Leave breathing room, avoid pressing warm bricks into fabric, and keep cords strain-relieved.
Q3) Why do my cables keep ending up near my feet?
A) Because the exit path is uncontrolled. Make one wall run for power and keep the under-desk center clear so chair wheels don’t “collect” cables.
Q4) Should I run cables down the desk leg?
A) It can work if it’s the back leg and stays out of the chair-wheel zone. Avoid the front leg where your eyes and feet notice it constantly.
Q5) What’s the one cable I should fix first?
A) The cable that touches chair wheels or your feet. Removing tug risk instantly makes the whole setup feel more stable.
Q6) Is cable management really an ergonomics issue?
A) Yes—because cable mess changes posture indirectly (leg shifts, micro-leaning, repeated tweaks). A stable setup removes those micro-distractions.
Internal Links
Cable Management for Small Desks: Clean Home Office Setup Blueprint
Cable Management Small Desk: 12-Step Blueprint for Clean Home Office
Surge Protector Power Strip Desk Setup: Safe Layout Guide
Sources & References
- OSHA — Computer Workstations eTool (workstation setup & safety principles)
- NIOSH (CDC) — Computer Workstation Checklist (PDF)
- HSE — Working safely with display screen equipment (DSE)
Professional Disclaimer
If you suspect overloaded outlets, damaged cords, overheating adapters, or persistent safety concerns, consult a qualified professional.
Update Log:
– 2026-01-07: Consolidated two drafts into a stability-first protocol: added routing priority matrix, practical failure modes, and a 60-second stability test (zone/spine/exits) while keeping the 3-Layer Method and small-desk routing patterns.

I’m not a medical professional, ergonomist, or workplace specialist.WorkNest exists to help everyday people build more comfortable, practical home office environments through clear explanations, visual guides, and common-sense adjustments.
Articles on this site are written from a non-expert perspective, focusing on real-world use, everyday discomforts, and widely accepted setup principles rather than clinical or professional advice.