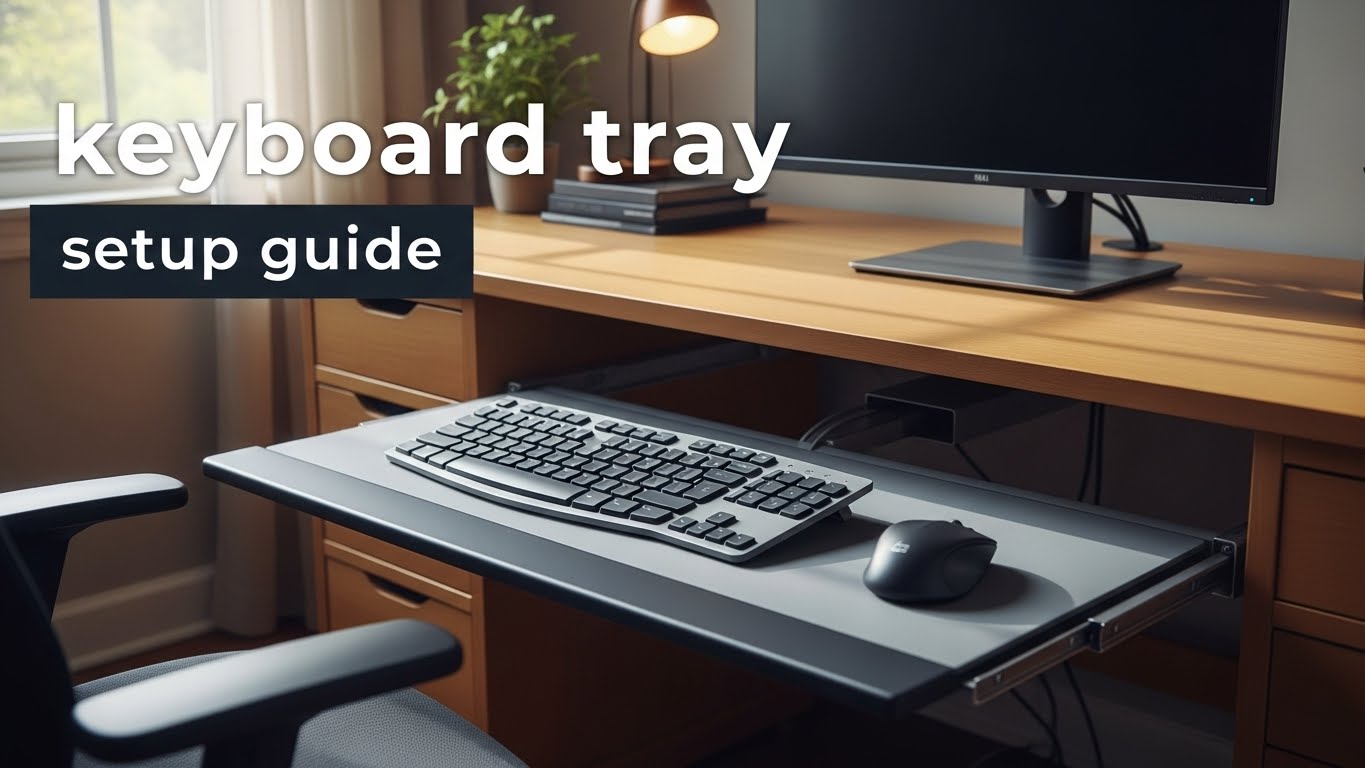
keyboard tray setup guide
What’s the correct way to set up a keyboard tray to reduce wrist pressure?
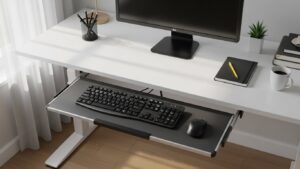
A good keyboard tray setup keeps your wrists neutral and your shoulders relaxed.
The fastest win is usually slight negative tilt (front edge a bit higher than the back) so you’re not typing with your wrists bent upward.
Then confirm the tray height so your elbows stay near your sides and you don’t “float” your arms.
- Tilt: aim for gentle negative tilt if it helps your wrists stay straight
- Height: keep elbows close to your body; no shoulder shrugging
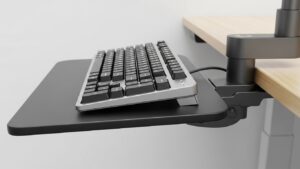
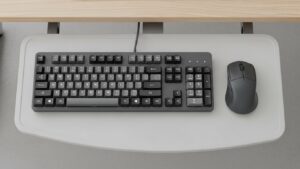
- Mouse: same height plane as the keyboard (avoid reaching)
- Depth: enough space so the keyboard isn’t jammed into your lap
- Wrists bend upward while typing (you feel pressure at the heel of the palm)
- Shoulders creep up (tray is too high or too far)
- Elbows flare out (mouse is placed too far to the side)
- Forearms “hover” because armrests don’t match the tray height
- Numbness/tingling that persists or worsens (don’t ignore this)
Last Updated: 2026-01-03 |
Expert Review: WorkNest Ergonomic Lab |
Author: WorkNest Team
- Set tray height so your shoulders stay relaxed and elbows stay close.
- Set tray tilt so wrists stay straight (slight negative tilt is often best).
- Place mouse at the same height as the keyboard (no reaching, no drop).
- Keep keyboard centered to your body, not centered to the tray edge.
- Do a 60-second test: type + mouse + shortcut keys. If your posture shifts, re-check height and mouse position.
Keyboard tray setup guide problems usually show up in a specific way: you start the day fine, then you notice your wrists pressing into the desk edge or your shoulders creeping up when you’re deep in work. The tray feels like it should help… but somehow you end up “floating” your arms or bending your wrists to reach the keys.
The frustrating part is that keyboard trays can be amazing or terrible depending on two details people skip: tilt and mouse placement. If your tray tilts the wrong way or forces the mouse off to the side, your body pays the price all day.
This guide is a simple setup protocol: find the height that relaxes your shoulders, choose the tilt that keeps wrists neutral, then lock the keyboard + mouse into one stable plane so your posture doesn’t drift by lunch.
Table of Contents
- 1) Do you actually need a keyboard tray?
- 2) Negative tilt vs positive tilt (what your wrists are telling you)
- 3) Height range: the shoulder + elbow test that doesn’t lie
- 4) Mouse placement: the hidden reason trays fail
- 5) Tray size and reach zone (depth matters more than people think)
- 6) Step-by-step setup protocol (do this once, stop tweaking daily)
- 7) Comparison table: good vs bad signals
- FAQ
- Internal Links
- Sources & References
- Professional Disclaimer
1) Do you actually need a keyboard tray?
A keyboard tray is useful when your desk height can’t get low enough for comfortable typing,
or when the desk surface forces your shoulders to lift and your wrists to bend.
But if the tray is flimsy, too small, or pushes your mouse out of position, it can backfire.
- Good use case: fixed-height desk that’s too tall, or limited desktop space.
- Bad use case: tray is narrow so the mouse sits far away; tray wobbles; tray forces wrists to bend upward.
- Reality check: the tray must support keyboard + mouse as a team, not just the keyboard.
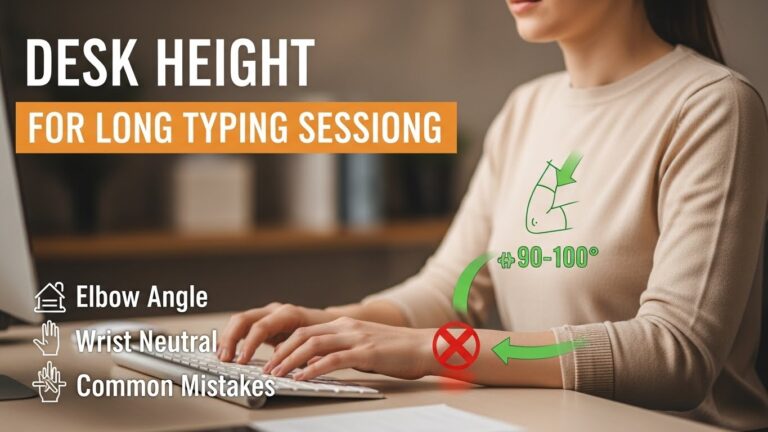
2) Negative tilt vs positive tilt (what your wrists are telling you)
“Tilt” is basically the tray’s angle. A lot of setups fail because the keyboard ends up tilted up in the back,
which can encourage wrist extension (wrists bent upward). If your wrists keep bending up, you’ll feel pressure fast.
Put your hands on the home row. Look at your forearm-to-hand line.
If your wrists bend upward, reduce positive tilt and try a gentle negative tilt.
3) Height range: the shoulder + elbow test that doesn’t lie
The “right” tray height is the one that keeps your shoulders relaxed and your elbows close to your sides.
If the tray is too high, shoulders creep up. Too low, and wrists bend or you slump forward.
- Sit back. Let shoulders drop naturally.
- Place hands on the keyboard. Keep elbows near your sides.
- If shoulders lift or elbows flare, lower the tray or bring it closer.
- If wrists bend up/down to reach, adjust height and tilt together (don’t “fix” one while breaking the other).
4) Mouse placement: the hidden reason trays fail
Even a perfect keyboard position can fail if the mouse is placed too far away or at a different height.
That creates reaching, shoulder elevation, and a “one-sided” workstation where one arm works harder all day.
- Best: mouse sits close, on the same plane as the keyboard.
- Common fail: tray is too small, so mouse ends up on the desk (higher), forcing shoulder lift.
- Fix options: wider tray, mouse platform, or compact keyboard to free space.
5) Tray size and reach zone (depth matters more than people think)
If the tray is shallow, you tend to pull the keyboard forward, which changes wrist angle and increases palm pressure.
If it’s too narrow, the mouse gets pushed away and your elbow leaves your body line.
If you constantly “search” for a mouse position, the tray isn’t supporting your workflow.
6) Step-by-step setup protocol (do this once, stop tweaking daily)
- Lock your seat first: sit back with feet supported and shoulders relaxed.
- Set tray height: hands on keys, elbows close; no shrugging, no “floating.”
- Set tray tilt: adjust until wrists stay neutral while typing normally.
- Center the keyboard: keyboard should align with your torso, not the tray edge.
- Place the mouse: close enough that your elbow stays near your body; same height plane.
- Test real work: type + shortcut keys + mouse for 60 seconds. If posture shifts, re-check mouse reach and tilt.
7) Comparison table: good vs bad signals
| Signal | Tray setup is off | Tray setup is solid |
|---|---|---|
| Wrists | bend upward / palm pressure on edge | neutral line from forearm to hand |
| Shoulders | shrugging or one shoulder higher | relaxed, symmetrical |
| Mouse reach | arm reaches outward, elbow drifts away | mouse close, elbow stays near body |
| Focus | constant micro-adjustments | you forget about the tray and just work |
FAQ
Q1) Should I use negative tilt on a keyboard tray?
A) If it helps your wrists stay neutral, yes. The goal is straight wrists—not a specific angle.
Q2) Is it okay if my mouse is on the desk and my keyboard is on the tray?
A) Usually not ideal. Different height planes often force shoulder lift or reaching. If possible, keep mouse and keyboard on the same plane.
Q3) Why do my shoulders creep up when I type?
A) Commonly the tray is too high, too far away, or the mouse position forces you to “hold” your arm up.
Q4) Should my wrists rest on a wrist pad while typing?
A) Many people do better using a pad only during pauses. While typing, aim for neutral wrists and avoid hard pressure on the heel of the palm.
Q5) Is it okay if my elbows flare out while using the mouse?
A) That’s often a sign the mouse is too far out or the tray is too small. Bring the mouse closer or change the layout to keep elbows nearer your sides.
Q6) When should I stop trying to “optimize” and get help?
A) If numbness/tingling persists, pain worsens, or symptoms spread, consider professional evaluation rather than endless setup tweaks.
Internal Links
Keyboard and Mouse Positioning: Wrist Pain Prevention Guide for Long Workdays
Desk Height by Body Height: Complete Guide to Correct Ergonomic Setup for Long-Hour Work
Mouse Grip Styles Explained: Reduce Wrist and Finger Fatigue (2025)
Sources & References
- OSHA — Computer Workstations eTool: Keyboards
- NIOSH — Computer Workstation Checklist (PDF)
- HSE — Working safely with display screen equipment (DSE)
Professional Disclaimer
This article is for informational purposes only and does not replace professional ergonomic or medical advice.
If you have persistent pain, numbness, tingling, or worsening symptoms, consult a qualified clinician or ergonomics professional.
Update Log:
– 2026-01-08: Published tray height + tilt protocol, added mouse-plane rules, tray size guidance, and symptom-based comparison table.

I’m not a medical professional, ergonomist, or workplace specialist.WorkNest exists to help everyday people build more comfortable, practical home office environments through clear explanations, visual guides, and common-sense adjustments.
Articles on this site are written from a non-expert perspective, focusing on real-world use, everyday discomforts, and widely accepted setup principles rather than clinical or professional advice.