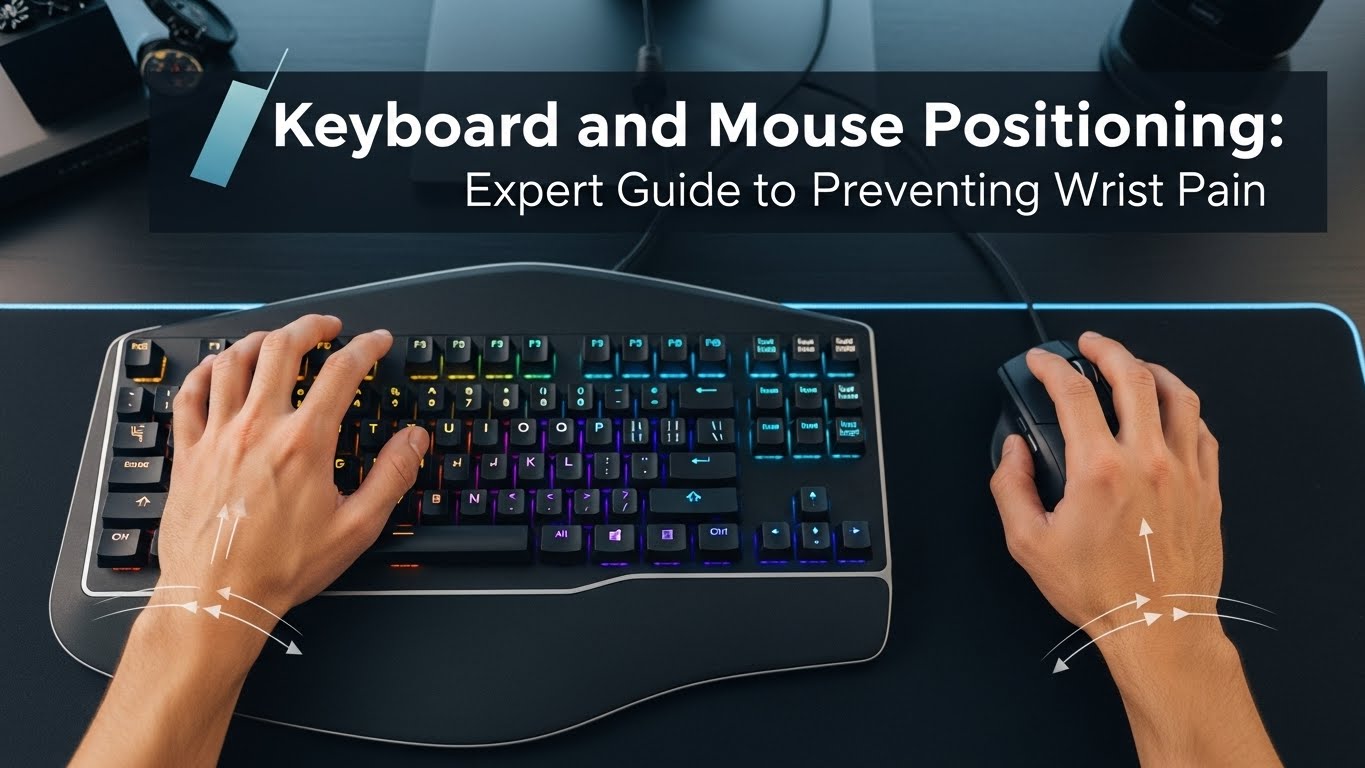
Keyboard and Mouse Positioning: Expert Guide to Preventing Wrist Pain
Last Updated: December 24, 2025 |
Expert Review: WorkNest Ergonomic Lab |
Author: WorkNest Studio Editorial Team
- Height: Keyboard and mouse should be at or slightly below elbow height.
- Wrist Angle: Keep wrists in a “Neutral Straight” line (avoid bending up or sideways).
- Placement: Keep the mouse as close to the keyboard as possible to avoid shoulder strain.
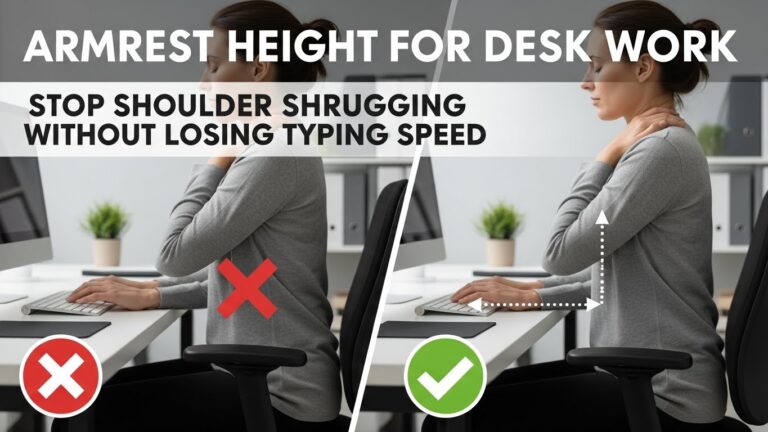
- Posture: Elbows should remain at a 90–110° angle, tucked close to your ribs.
Incorrect keyboard and mouse positioning is a silent killer of productivity.
Most users spend 8+ hours a day with their wrists in a “cocked” position, leading to stress patterns like
ulnar deviation and repeated pressure through the carpal tunnel region.
This guide gives you a practical blueprint to reset your workstation for pain-free performance.

Table of Contents
- 1. The Neutral Wrist: Why Straight is Safe
- 2. Keyboard Height for Wrist Pain Prevention (Negative Tilt)
- 3. Mouse Positioning to Prevent Shoulder Reach and Ulnar Deviation
- 4. Pro Tip: Why Tenkeyless (TKL) Keyboards Win
- 5. Correct vs. Incorrect Positioning Table
- 6. Floating Typing & Wrist Rest Best Practices
- 7. FAQ
- 8. Internal Links
- 9. Scientific References
- 10. Professional Disclaimer
1. Neutral Wrist and Keyboard and Mouse Positioning Basics
A neutral wrist is where the hand, wrist, and forearm form a straight, unbroken line.
When you bend your wrist upward (extension), the carpal tunnel space can narrow, increasing pressure on the median nerve region.
Even small angles sustained for hours can trigger inflammation patterns and fatigue.
2. Keyboard Height & The “Negative Tilt” Secret
Most people use the pop-out feet on the back of their keyboards. This is often a mistake.
Raising the back of the keyboard pushes wrists into extension.
- Negative Tilt: Tilt the keyboard slightly away from you so wrists stay flatter while fingers reach the keys.
- The Elbow Test: Forearms should be parallel to the floor or angled slightly downward while typing.
3. Mouse Positioning: Avoiding the “Shoulder Reach”
Wrist pain often starts at the shoulder. If the mouse sits too far to the side, the arm performs sustained
abduction, increasing shoulder load and forcing the wrist to compensate with sideways bending (ulnar deviation).
Keep the mouse in the “primary reach zone” — close enough that your elbow stays tucked.
Mouse placement rule for computer desk ergonomics
- Mouse directly beside the keyboard (minimize gaps).
- Move from the elbow/forearm, not just the wrist joint.
- Relax grip pressure—avoid “death grip” during focused work.

4. Pro Tip: Why Tenkeyless (TKL) Keyboards Win
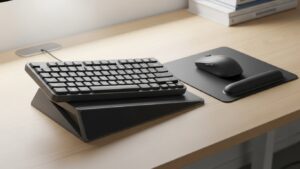
Full-size keyboards with a number pad push the mouse several inches outward.
Switching to a tenkeyless (TKL) or 75% keyboard reduces lateral reach and helps keep your hand position closer to your centerline.
For many users, this alone reduces shoulder-driven wrist strain.
5. Correct vs. Incorrect Positioning Table
| Feature | Incorrect (High Risk) | Correct (Ergonomic) |
|---|---|---|
| Wrist Support | Resting on desk edge | Floating typing + palm support during pauses |
| Mouse Location | Far right (shoulder reach) | Beside keyboard (neutral reach) |
| Keyboard Angle | Back feet raised | Flat or slight negative tilt |
6. Floating Typing & Wrist Rest Best Practices
Contrary to the name, wrist rests should not support your wrists during active typing.
Pressure directly over the carpal tunnel area can worsen symptoms for some people.
Use rests to support the heel of your palm during breaks, and let hands “float” while typing—like a pianist.
7. FAQ: Mechanical Keyboards, Vertical Mice, and More
Q1. Will a vertical mouse help my wrist pain?
A. It can help if your discomfort is linked to forearm rotation (pronation). A vertical mouse keeps the hand closer to a neutral “handshake” posture, but height and distance still matter.
Q2. Should I use a wrist rest for my mouse?
A. Usually no. Many mouse rests lock movement to the wrist joint. It’s often better to move from the elbow/forearm and keep the wrist neutral.
Q3. Is a mechanical keyboard better for wrist pain?
A. Not automatically. What matters is key force and typing style. Lighter actuation and avoiding “bottoming out” can reduce fatigue, but positioning is still the main factor.
Q4. How close should my mouse be to the keyboard?
A. Ideally right next to it—gap minimized. If your elbow drifts outward, you’re reaching too far.
Q5. My desk is too high—what’s the best fix?
A. Lower the chair only if your feet stay supported. Otherwise, use a footrest and consider a keyboard tray or adjustable desk setup to keep elbow height correct.
Q6. How long does it take to feel improvement?
A. Many people notice reduced tightness within a week after correcting keyboard and mouse positioning, especially if they also reduce grip tension and take micro-breaks.
8. Internal Links
Desk Height by Body Height
Monitor Distance Eye Level
Ultimate Guide to Building a Comfortable Work-from-Home Corner
9. Scientific References
- NIOSH: Workstation ergonomics and upper limb strain
- Mayo Clinic: Carpal tunnel syndrome (overview)
- OSHA: Ergonomics (keyboard and mouse setup fundamentals)
10. Professional Disclaimer
The information on keyboard and mouse positioning is for educational purposes and does not replace professional medical advice.
If you experience persistent tingling, numbness, or loss of grip strength, consult a qualified medical professional to rule out nerve injury.

I’m not a medical professional, ergonomist, or workplace specialist.WorkNest exists to help everyday people build more comfortable, practical home office environments through clear explanations, visual guides, and common-sense adjustments.
Articles on this site are written from a non-expert perspective, focusing on real-world use, everyday discomforts, and widely accepted setup principles rather than clinical or professional advice.